Everyone needs bookcases. Those of us who are book lovers need a lot of bookcases. Over the years, I have built a number of different bookcases, sometimes just to see what I could learn about the process. These include a very small version of Jeff Gorman's A Bookcase In Oak, and a set of barrister's bookshelves derived from one owned by my mother-in-law. But in the background, I was always on the lookout for a good basic design that could be built with reasonable speed and minimal cost, and could be adapted to meet the needs of different rooms. The closest I have come in the past is a basic design for a short bookcase for a set of Great Books of the Western World. This design was replicated and modified when I moved into a house with short upstairs walls. But I was pleased to note a well-written article in the June 2005 issue of Popular Woodworking by Robert Lang, called Build Better Bookcases. This design fulfilled many of my criteria and was more suitable for the conventional tall bookcases I wanted than what I had been building.
The basic design uses one sheet of 3/4 inch plywood plus hardwood trim to build a reasonable sized bookcase. In my case, the project list called for a pair of them to go on the sides of my fireplace. My mother-in-law had a Mission style bookcase with doors that I have always wanted to replicate, but I decided to replace the two projects with one. All I had to do was build two bookcases to fit under the mantle, add doors, and I would be done. The original article provides four possible style variations - Arts and Crafts, Shaker, Contemporary, and Formal. Since the room already contained some Arts and Crafts tables (admittedly in company with a lot of mixed styles of furniture), I chose that route. Of course, I had to adapt the design to the space available. I also had a lot of red oak in the shop, so I decided to use that instead of white oak. And I had some experience with Jeff Jewitt's Mission Oak Finish, which I wanted to use here. Finally, being a hand tool kind of guy, I needed to make some changes to the way the joinery was done. So there you have it - other than dimensions, materials, joinery, and finish, it's exactly the same as the ones in the article. Except for the doors. Ahem.
I refer everyone to the original article anyway, as it will tell you how to build this in a very straightforward way. And when I ran into some confusion due to my intentional lack of familiarity with how to do some table saw operations, Bob Lang was very quick to get back to me and show me how to accomplish what I needed to do. While the original article was fairly power tool oriented, this was a bit of a hybrid project for me. I traditionally use the table saw for rough dimensioning of stock and move to hand tools for most operations anyway. Here's another example - this project uses pocket screw joinery for the face frame. While I have made plenty of face frames by hand using M & T joints, I wanted to give this a try. I used a power drill to drill the holes, but drove the screws in with a Yankee driver. That's a pretty typical blending of old and new technology in my shop.
In this article, I will try to focus on what I did that was at variance with the original. I have already mentioned that I used red oak instead of white oak, but the design would work equally well in both materials. I was just trying to use what I had on hand.
The original layout resulted in a bookcase that was five feet tall and 30.5 inches wide. The original bookcase design is a bit short for some rooms, and isn't very deep. But in my case it was too tall and too wide for the allotted space. Luckily, I rechecked the width, as the bottom molding had to clear a side wall and a row of bricks that are guaranteed to tear up the side piece when moving the bookcase into position. I ended up making the bookcase only 29 inches wide, which allowed me to reallocate the space available on the 4 x 8 sheet of red oak plywood. This gave me an extra inch of depth. A good thing, too, as I still have books that are too deep to go in this case. I was also lucky enough to obtain some very nice plywood that turned out to be a true 3/4 inch, so I did not have to adjust any dimensions.
The side effect of this bookcase having to fit under the mantle was that I decided it did not need to have the center shelf attached. The back provides sufficient rigidity to keep the sides straight. I would follow the plan if I was building a five-foot-tall bookcase, but I believe a four-foot one can do without. All three shelves are unattached in this implementation.
Since I don't own a biscuit joiner, I went with a more traditional cleat under the top and the bottom shelf. This is simple a small block of oak, about 3/4 inch square, screwed into the side wall and the bottom of the shelf or top. Two screws in each direction provide enough strength. The overall design is very forgiving, with the back (a full 3/4 inch thick) providing effective prevention against racking.
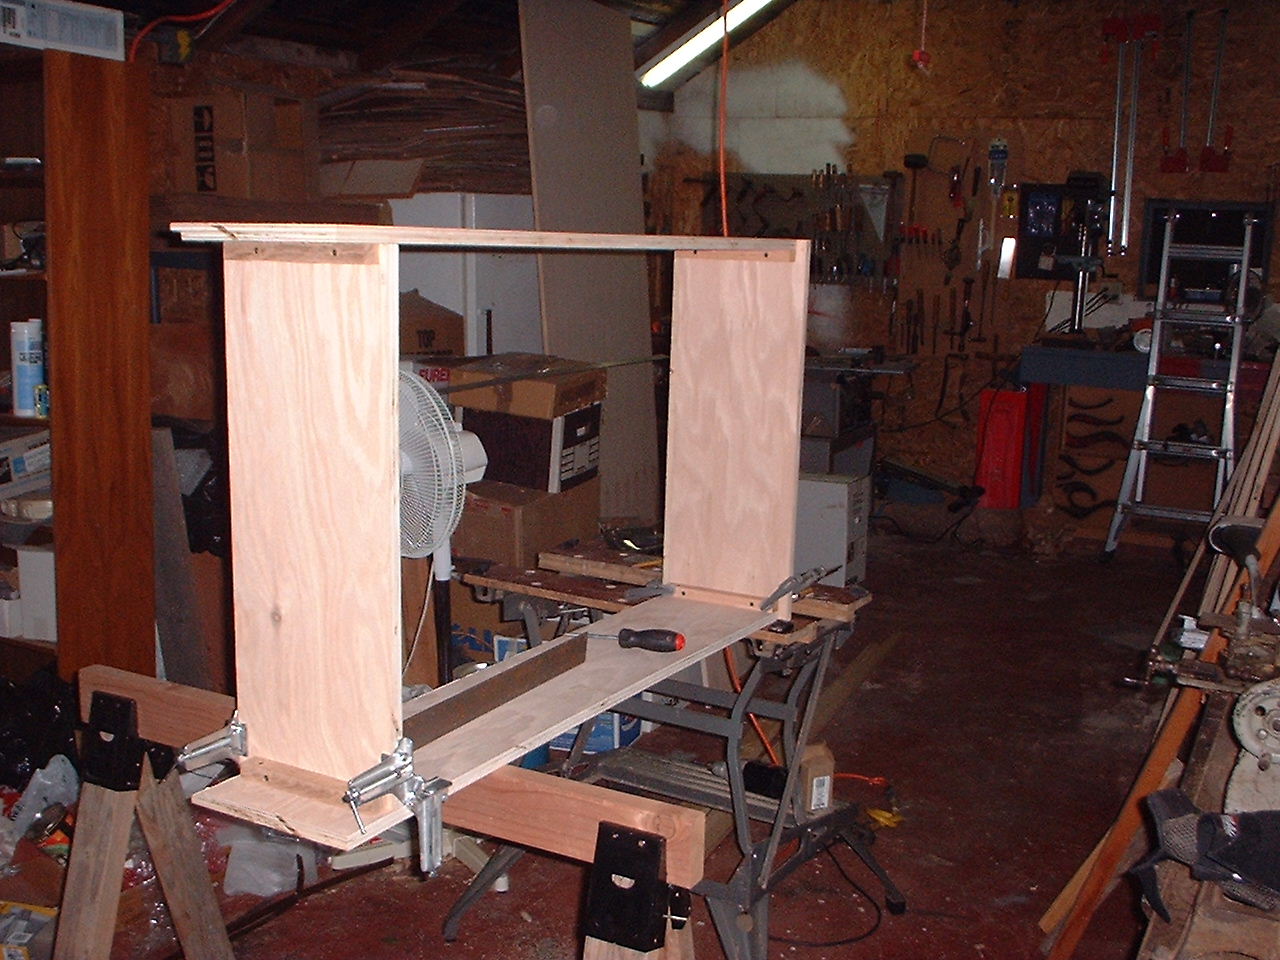
In this picture, you can see the carcase going together with the cleats in place. Note the use of corner clamps to keep things in alignment. The roofing square on the inside is keeping things nicely square. In the end, my "every project is an excuse to buy a new tool" acquisition was a speed square. Until I read Bob Lang's article, I had never even heard of one, but it's ability to stand on its own wide edge makes it an extremely useful addition to the shop. I didn't have one at this point, though. Note also that the sides and top have rabbets to receive the back.
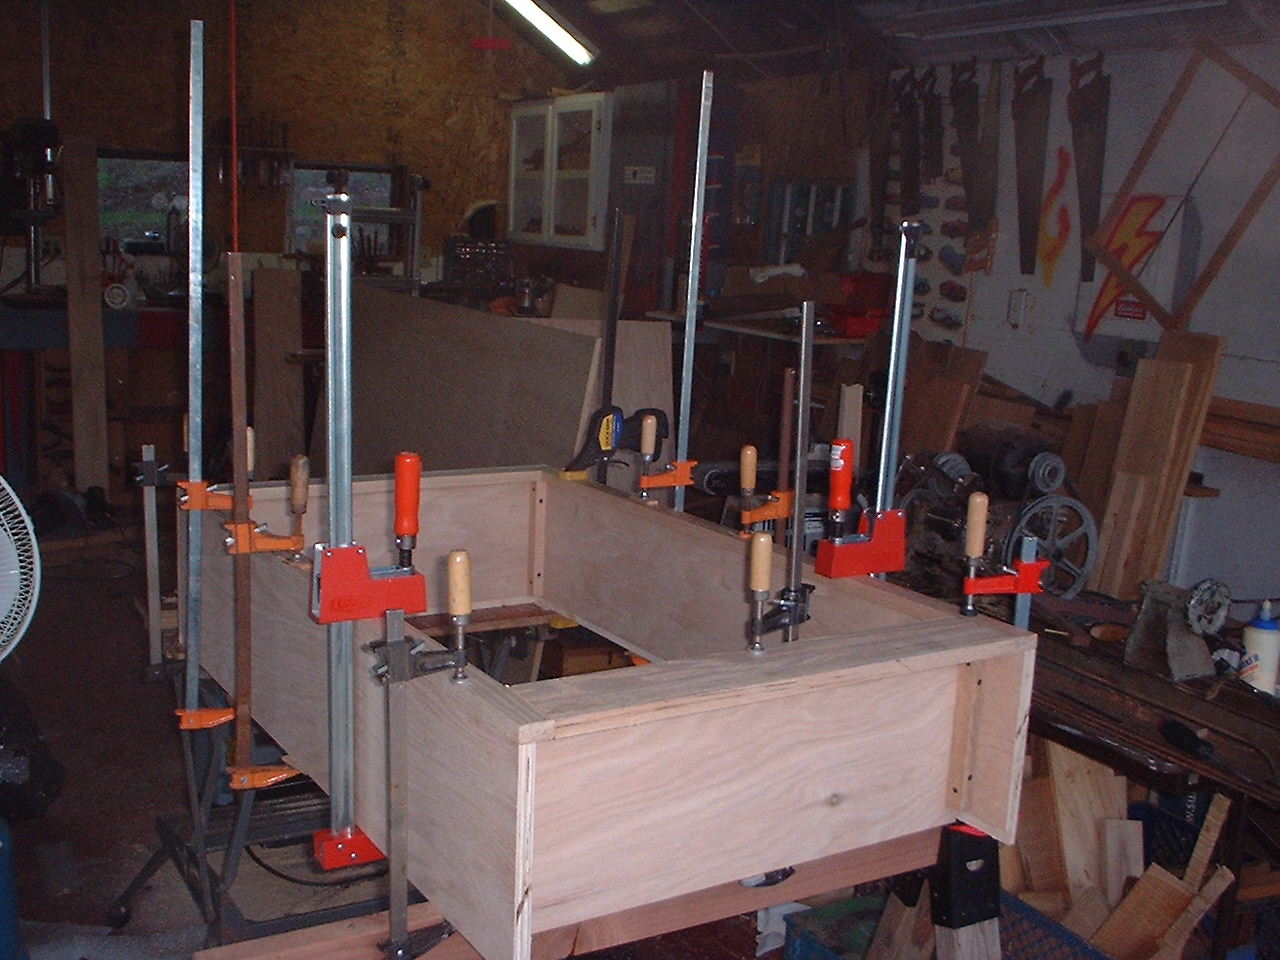
After the carcase is built, you build the face frame to fit it (making sure the carcase is square, of course). It's really just four sticks of wood held together with pocket screws. When you have a carcase and a face frame you glue them together. This picture shows the "clamp forest" holding everything in place. It's a pretty motley collection of clamps, but I threw almost everything I had at the problem. The face frame is slightly proud of the carcase so it can be planed flush later.
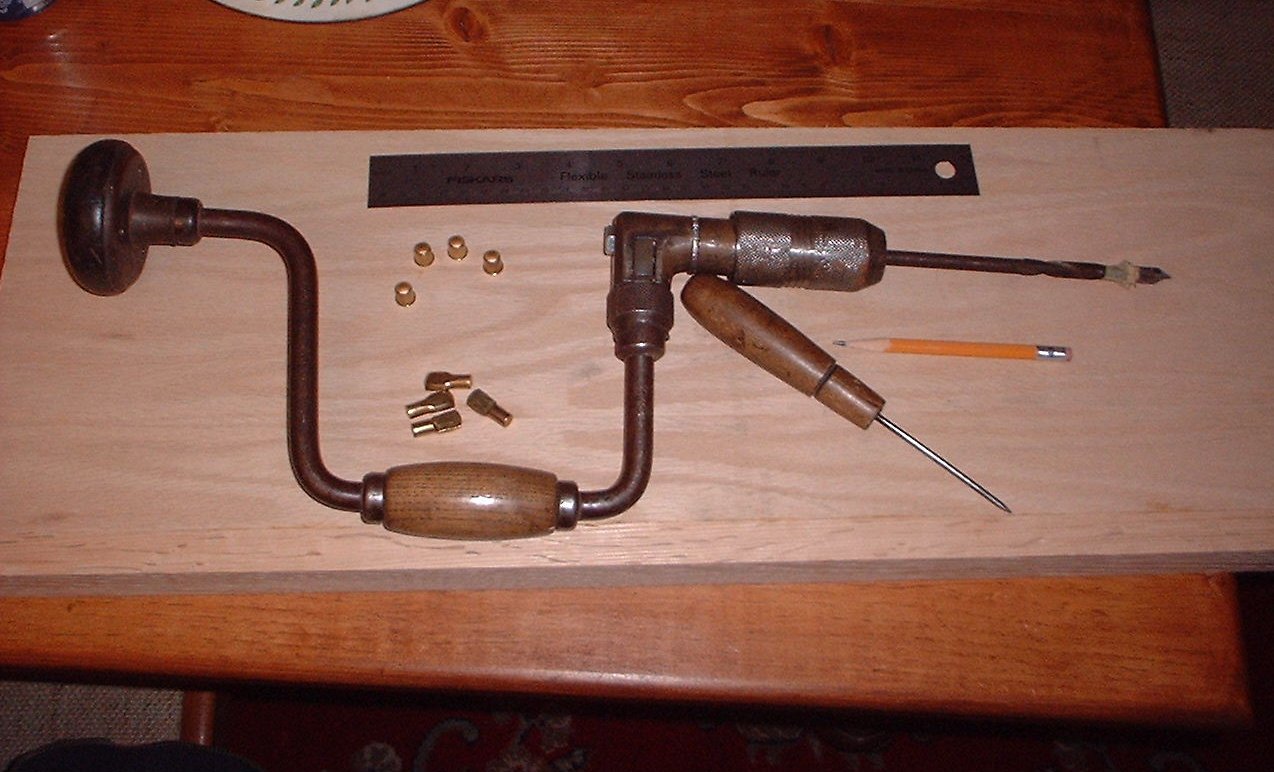
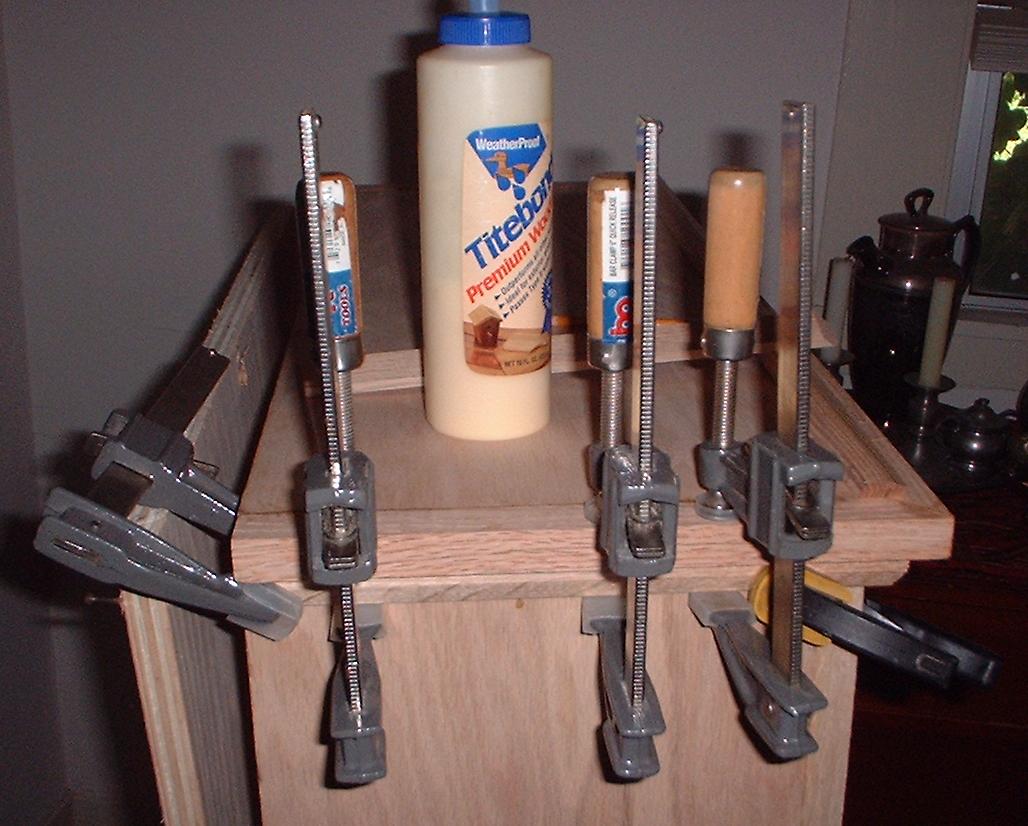
While you wait for the glue to dry, you can move on to the shelves. I use four sleeve and paddle supports that I buy from Lee Valley as shelf supports in all my projects. This works well enough if you have the confidence to know your shelf spacing is never going to change. The shelves themselves are just a piece of plywood with a hardwood front piece glued on. Since the bookcases are shorter than the original, I cut down the height of the front pieces a bit to keep them to scale. In this picture, you can pretty much see what you need to install the shelf (on which the tools are resting). Mark the locations carefully, and be very afraid of drilling through the side of the case. I have a flag made from blue painter's tape on the twist drill bit to tell me when to stop. I almost always get it right. Thinner plywood might have been a problem, though.
Since I was building two of these, I tended to alternate. I would move a few steps forward on one bookcase, then catch up on the second. In this picture, you can see where these go. The bookcase on the left has shelves in place, with spacing determined by the books that will go inside. Merry Christmas, and please excuse the mess. Note that I have acquired the speed square by now, as it's on the dining room table. Isn't that where you keep yours?
You may note that the left bookcase above has some trim pieces attached. There is a pretty good amount of trim on these bookcases, both around the top and the bottom. Making it is pretty conventional woodworking, and I won't go into too many details. Some of it can be done using power tools, or all of it can be made with hand tools. It's just a bit of a challenge. But even with power tools, you will need to establish a straight edge first (unless you have a reliable source of S4S lumber). That calls for good old-fashioned work with a jointer.
Once you have a good edge, you can rip the board to width and start working out how to make the bevels as described in the original article. I roughed it in with the table saw, then cleaned it all up with a block plane on the bench. The challenge is in finding ways to hold the piece while planing it, but it can be done.
Since the trim meets at the corners, some miter work is called for. Watch those fingers!
Once it's done and a perfect fit, then it gets glued on to the carcase.
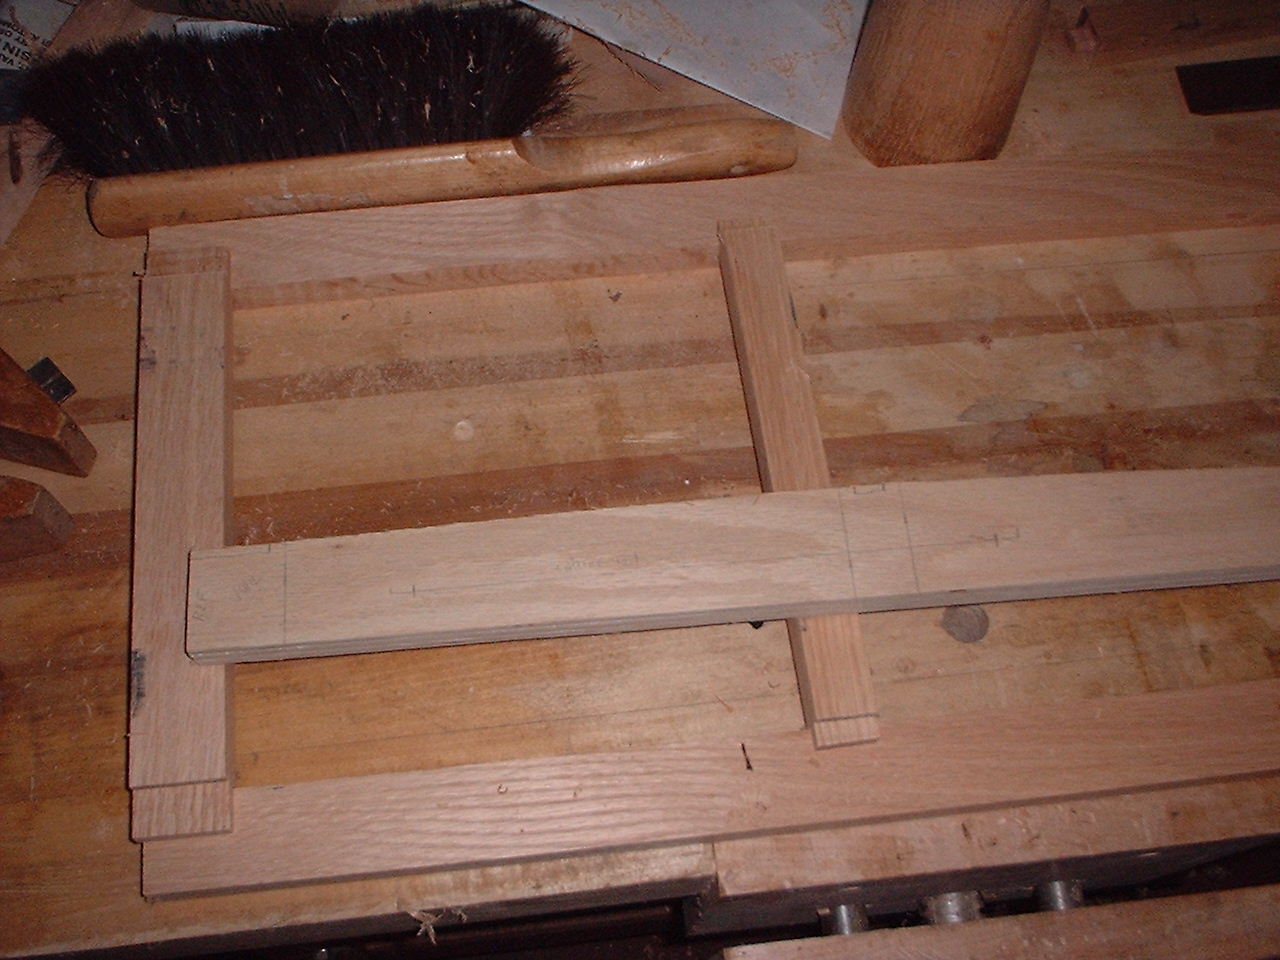
The doors were the most difficult part of the project, and since they are not covered at all in the article, I will probably spend most of my time talking about this part of the design. The design itself took a while, as I could not really decide how I wanted them to look. I ended up prototyping them by taping sticks of oak to the vertical members in various configurations. This included not only the number of lights (glass panes) but their spacing and the size of the sticks that separate them. In the long run, I went with four equally spaced lights with a fairly small amount of wood separating them. My thanks to all my woodworking friends who looked at the daily (sometimes hourly) pictures I shot and told me what they thought worked best. This design could not have been completed without digital photography. Here's an example of the final design - not installed, just sitting there.
Making four identical doors with relatively tight dimensions calls for setting aside your tape measure and using a story stick. It's most important that they be the same, and it's far too easy to read a rule incorrectly. The stick is slightly longer than the door, has reference marks where appropriate, and ensures that the lights all come out the same size. You only need to get it right once, when you make the stick.
Note also that there's no pocket hole joinery here. Since the frame will be rabbetted to receive the glass, there is no easy way to do this. But mortise and tenon joinery is pretty easy after the first few dozen times. And if you don't own the tools that you need for this job, then it's a good excuse to go acquire them. You will need a rip (dovetail, here) and a sash saw (a 12-14 inch backsaw filed as crosscut for making sash), some appropriate sized chisels, a good square, a mortise gage, and a shoulder plane for cleaning up the saw marks.
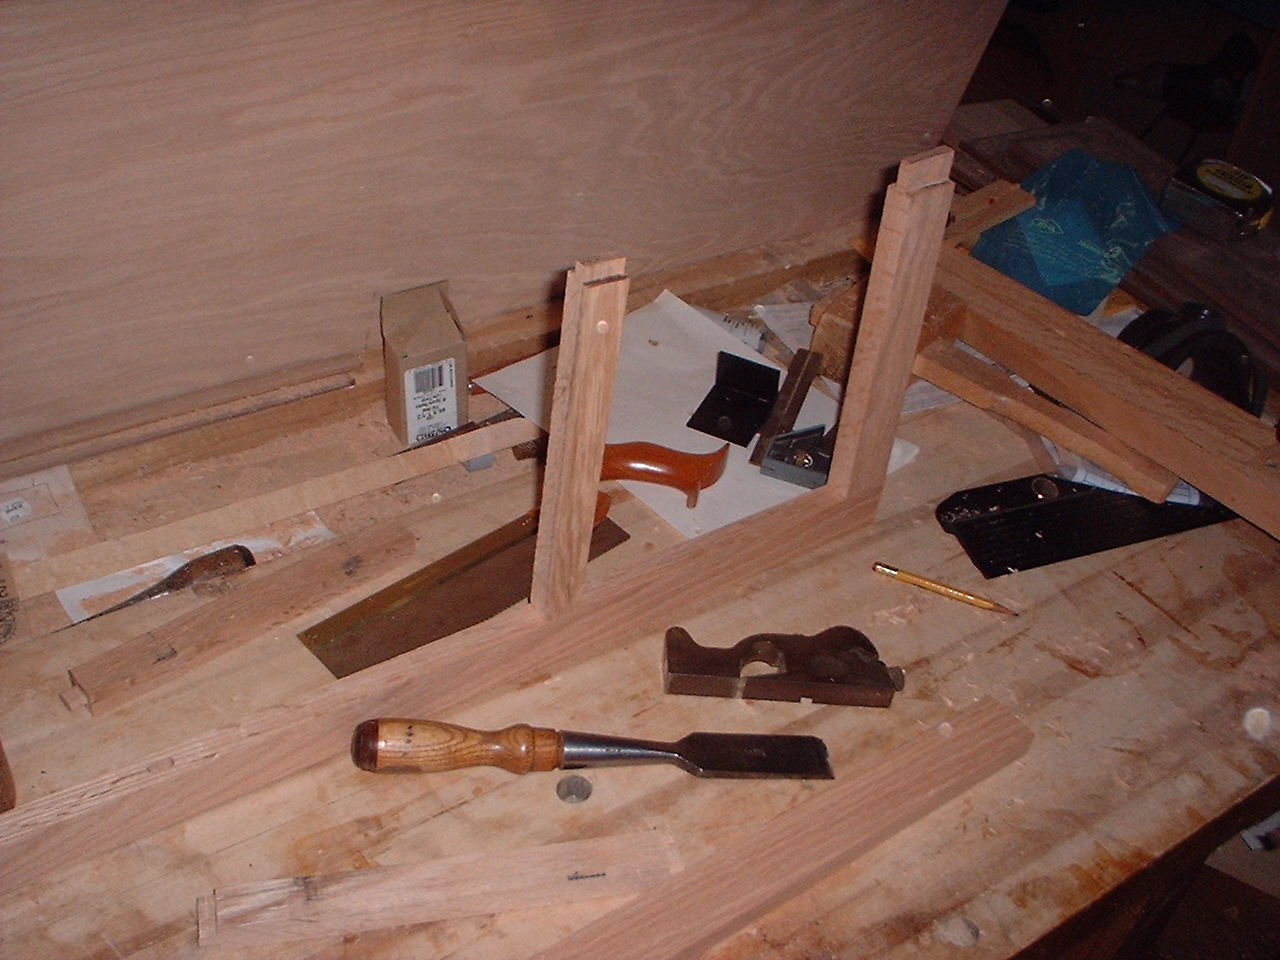
With all the pieces on the bench and the joints all cut, it's about ready for glue-up.

Once you have a pair of doors assembled, you can begin to see what it's going to look like.
I actually glued up the doors first, then cut the rabbets in place. I was running far behind on this, so I cheated and used a rabbetting bit in a router to get close, then cleaned up all the corners with chisels. I don't do my own glass work, as it is easier to just chop the rabbets, apply the finish to the doors, and then hand them off to your local glass pusher and say "Make these have glass in them, I'll pick it up in a couple of days."
In some ways, this was the most time-consuming aspect of the project, although I really like the results. I am teaching a course in this finish at the local Woodcraft, and it never hurts to have some actual experience behind what you teach. Jeff's Homestead Finishing web site provides good instructions on how to produce this finish. The only variation here is that in a fit of impracticality, I decided to make my own glaze from glaze base and Japan colors. It's a way to get the color you want, except that you have to mix the stuff up before you use it and you might not quite remember what you did the last time. Happily, it is a finish that is pretty forgiving. It does take about a week to apply even if you take a more sensible approach than I did.
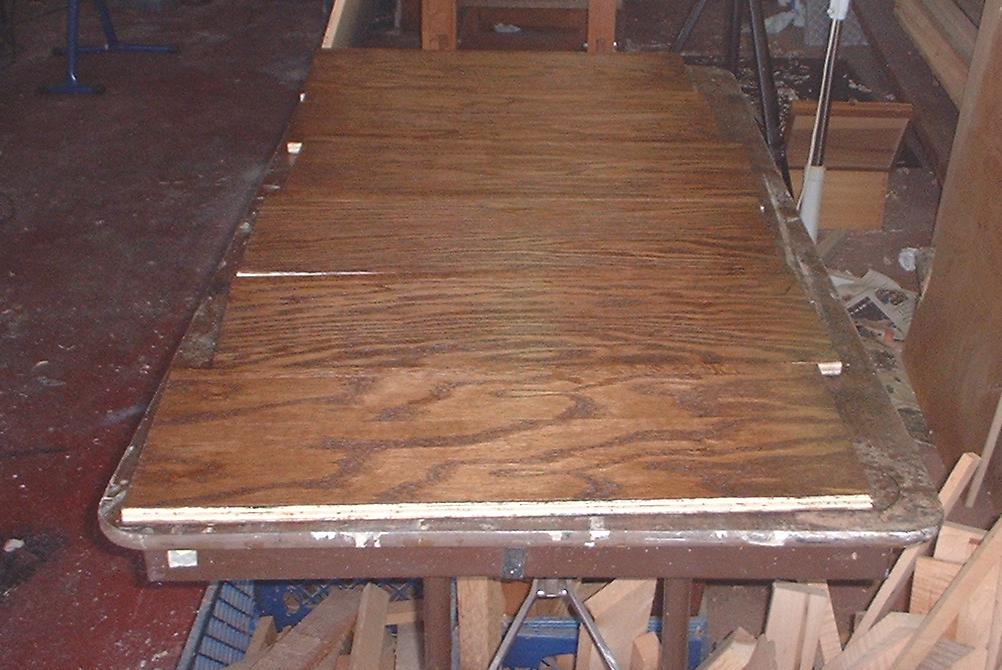
I have provided pictures of the six shelves going through the various steps of the process. Here, the dye stain is being applied to the scraped and sanded shelves.
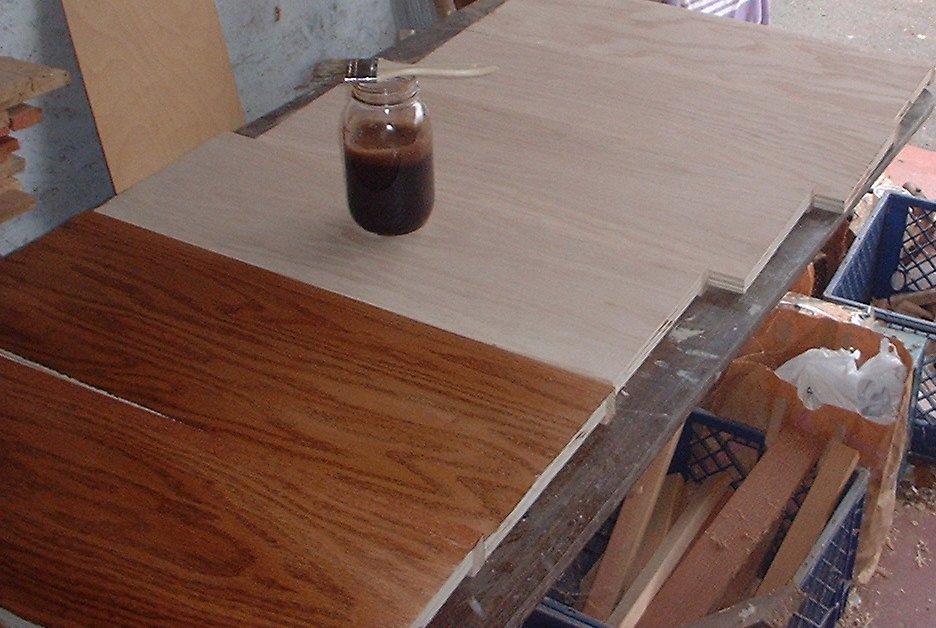
Once dry, the water-based dye stain is isolated from the oil-based glaze coat by a sealer coat of shellac.
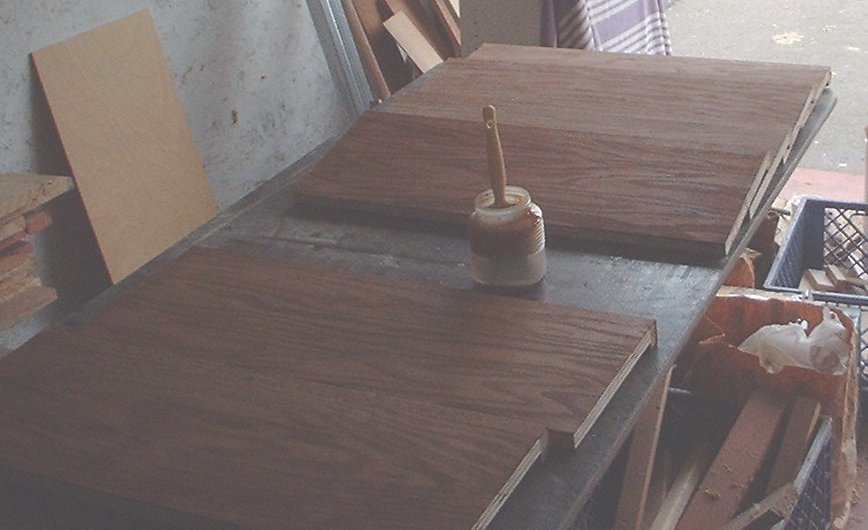
Once this is dry, the glaze coat is brushed on, then brushed in with a stiff brush, then wiped off.
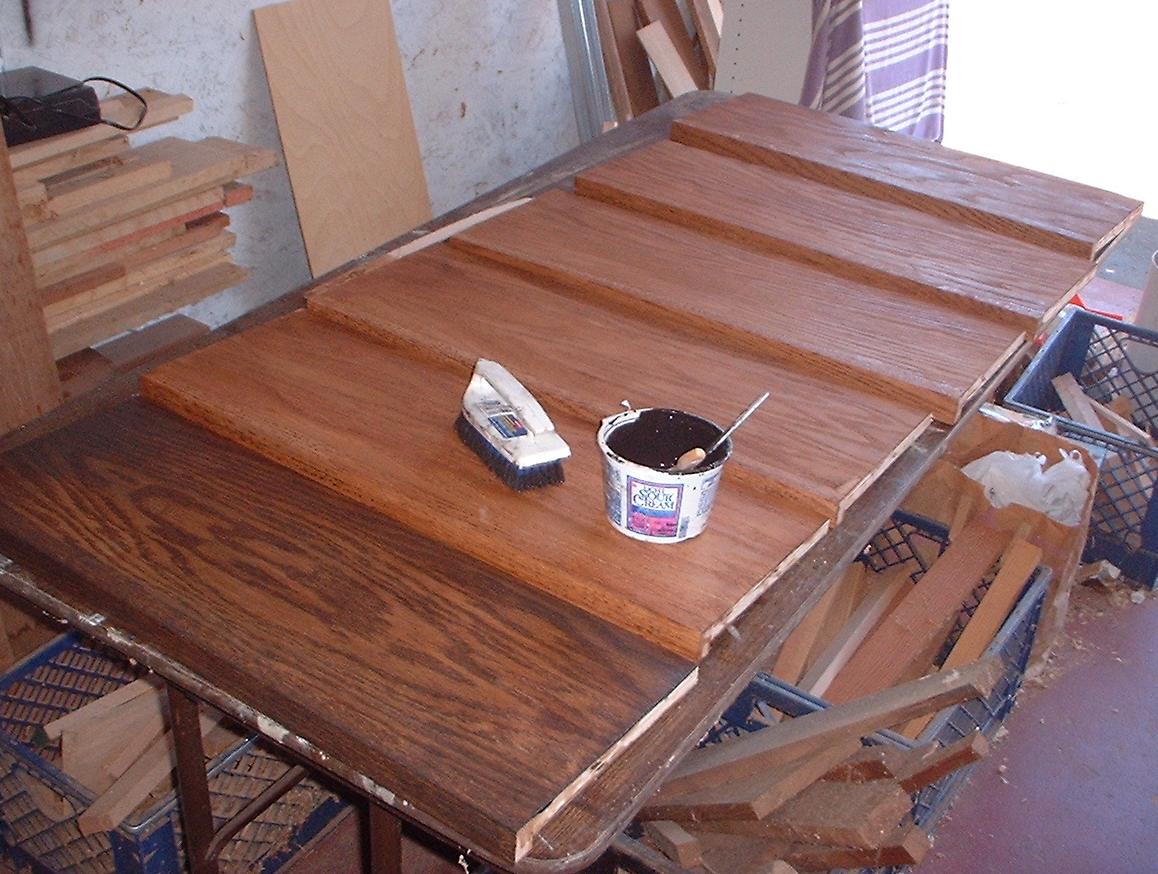
This takes a while to dry (about two days is safe). Then I added three coats of lemon de-waxed shellac.
A coat of paste wax gets applied as a top coat.
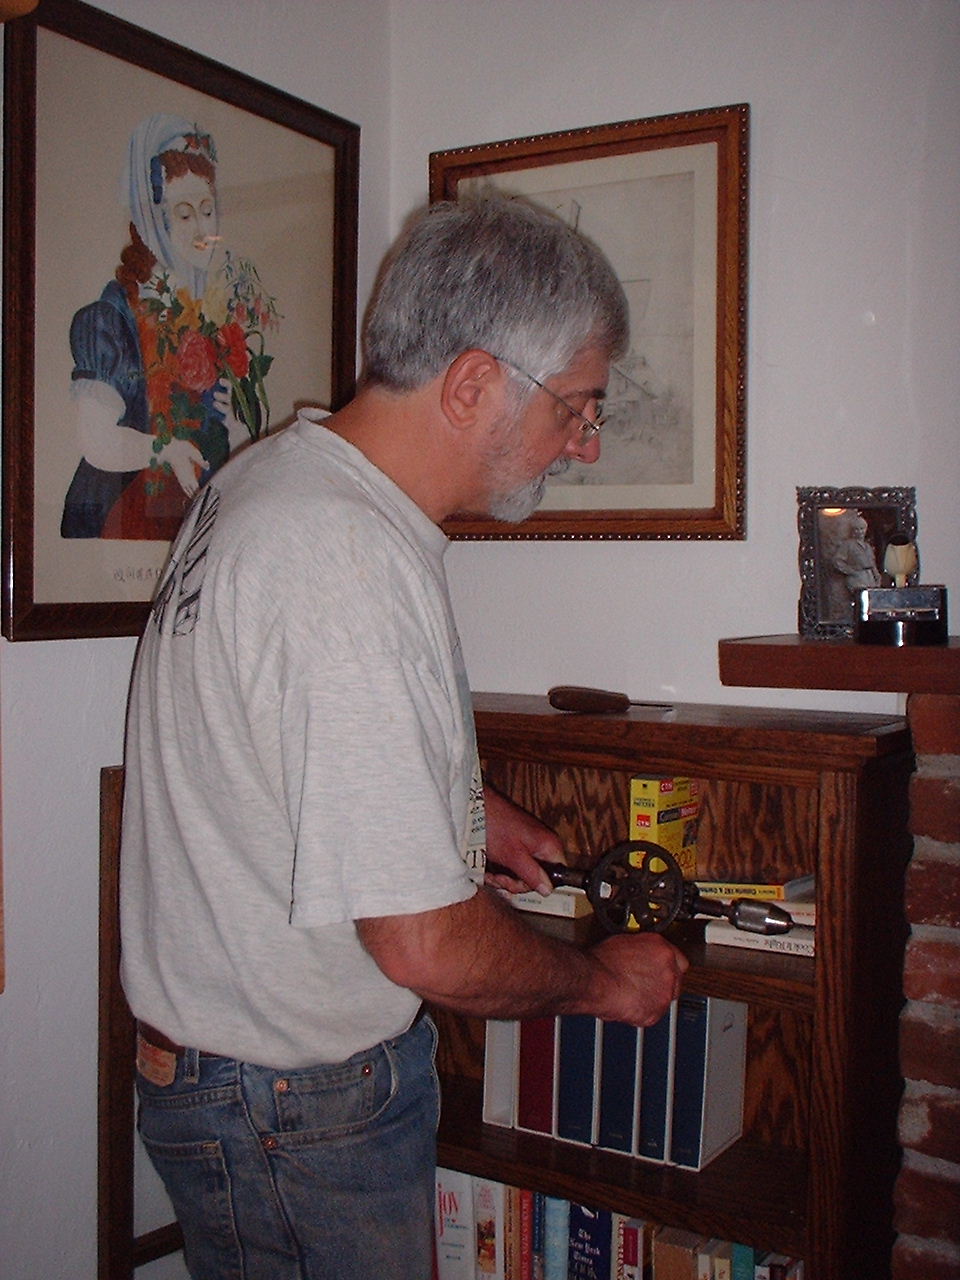
This was actually the last step. I used hinges and door pulls form the Lee Valley hardware catalog. Here, I am drilling holes for the face frame side of the hinges. What do you mean you're supposed to finish building it before you put the books in?
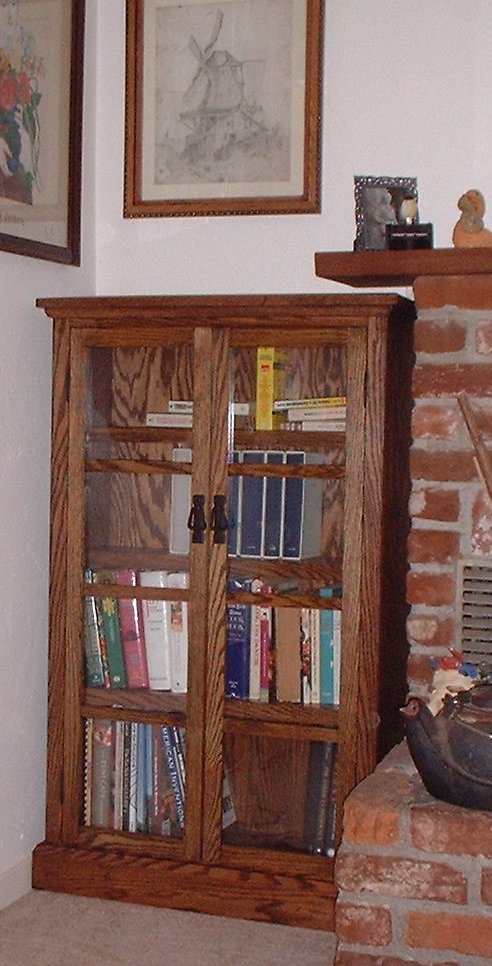
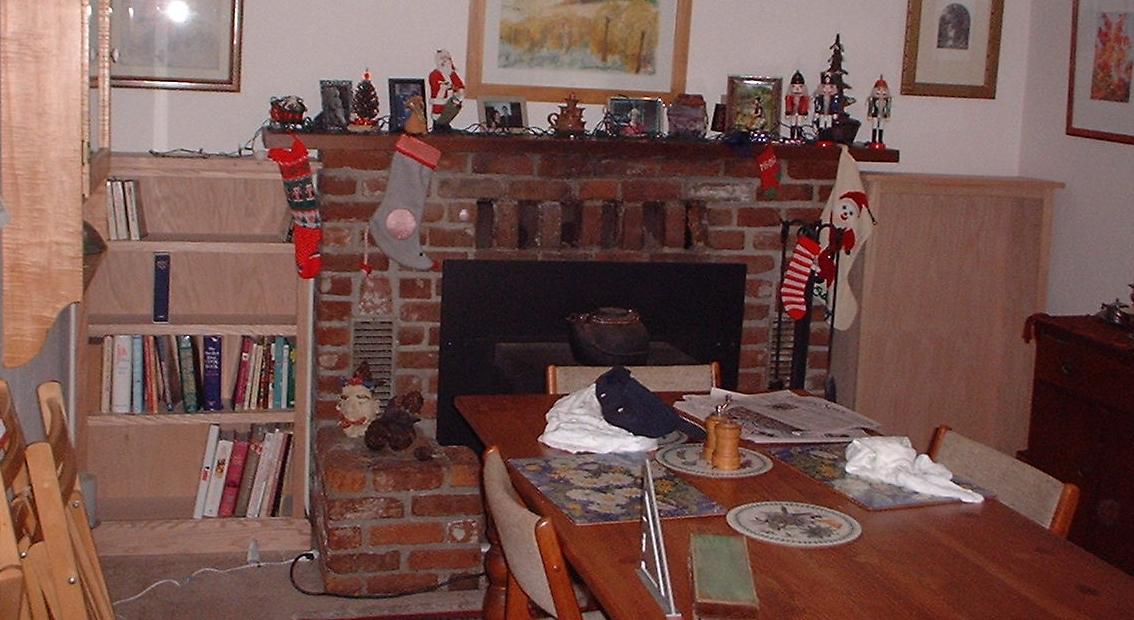
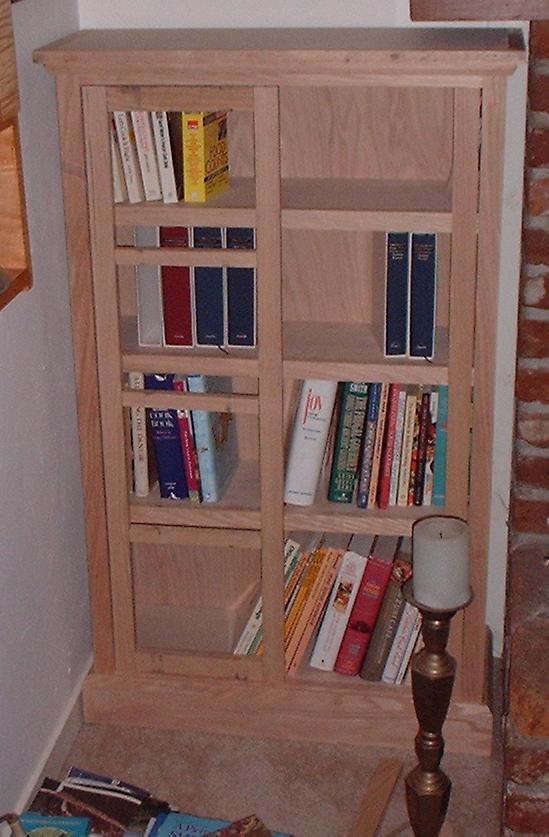
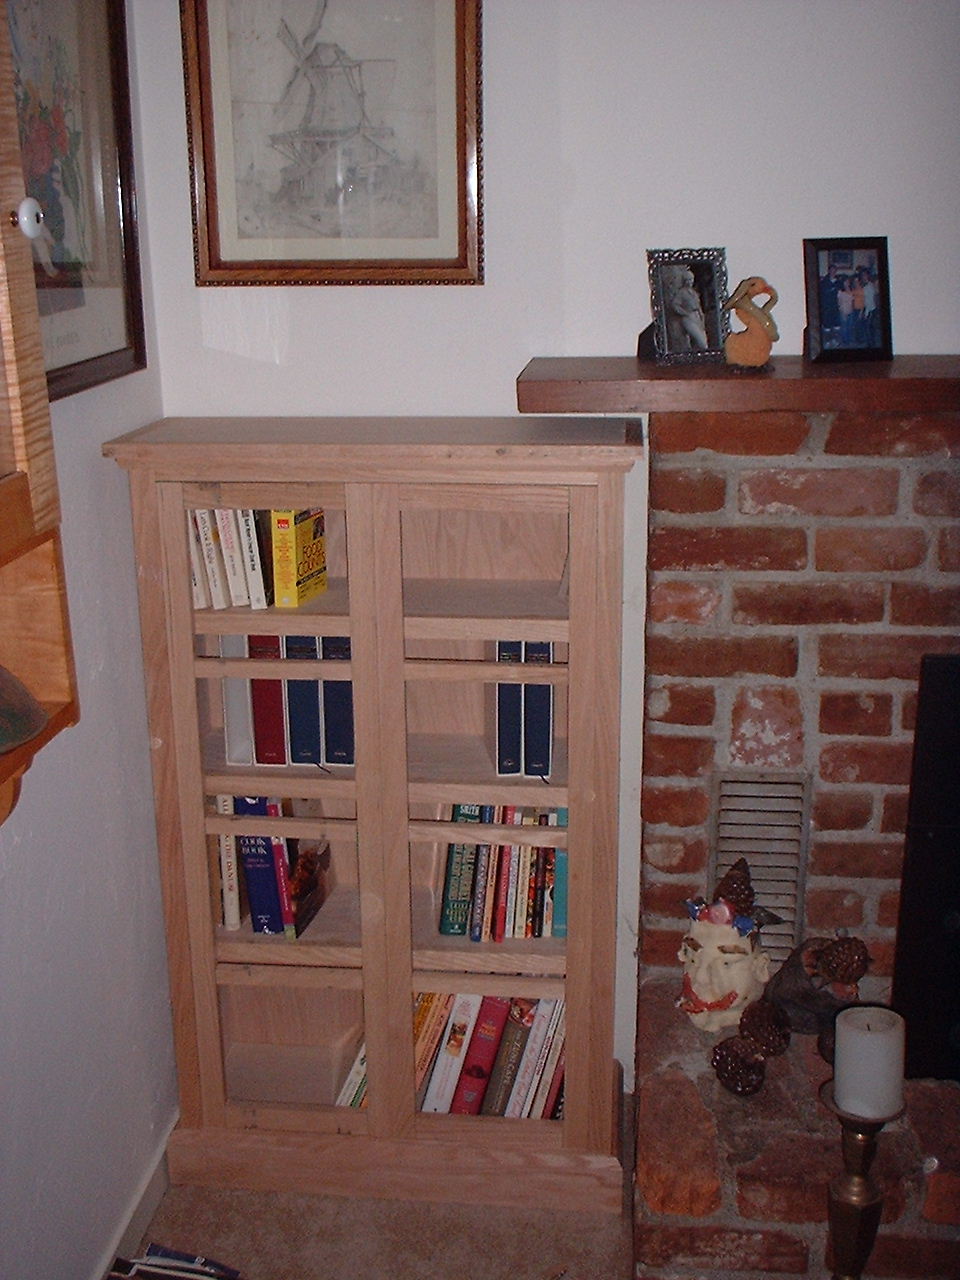
And the final result (yes, there's another one on the other side of the fireplace):