I was browsing a Lee Valley catalog late in 2022 looking for woodworking-oriented Christmas presents for my grandson, now 11. One of things that was a bit advanced for him but that looked interesting to me was a starter ket for kumiko. This is a Japanese technique for creating complex patterns from wood without the use of any adhesives or fasteners. Everything is held in place by tension, or compression, or just making sure everything is an absolutely perfect friction fit. Definitely a technique that appeals to those of us that are a bit OCD. Kumiko started in the 8th century. It is still made today, using about 200 standard patterns. Most of these go back to the Edo period - 18th and early 19th century.
The starter kit contains an array of sticks in two different thicknesses, a pattern, and (online) a video showing how to do it. The pattern is the most common one: asa-no ha (as I was taught to write it, which could be completely wrong) which means morning's leaf. You can find a lot of variations online; writing it as a single word is common.
I thought I would do my usual web page describing how I got through a project, step by step. But do look at the video (search for kumiko on LeeValley.com) which shows you how to build the jigs and such. I am planning to make a box with this inset into the top, although it will be pretty big. The pattern is nearly eight inches square.
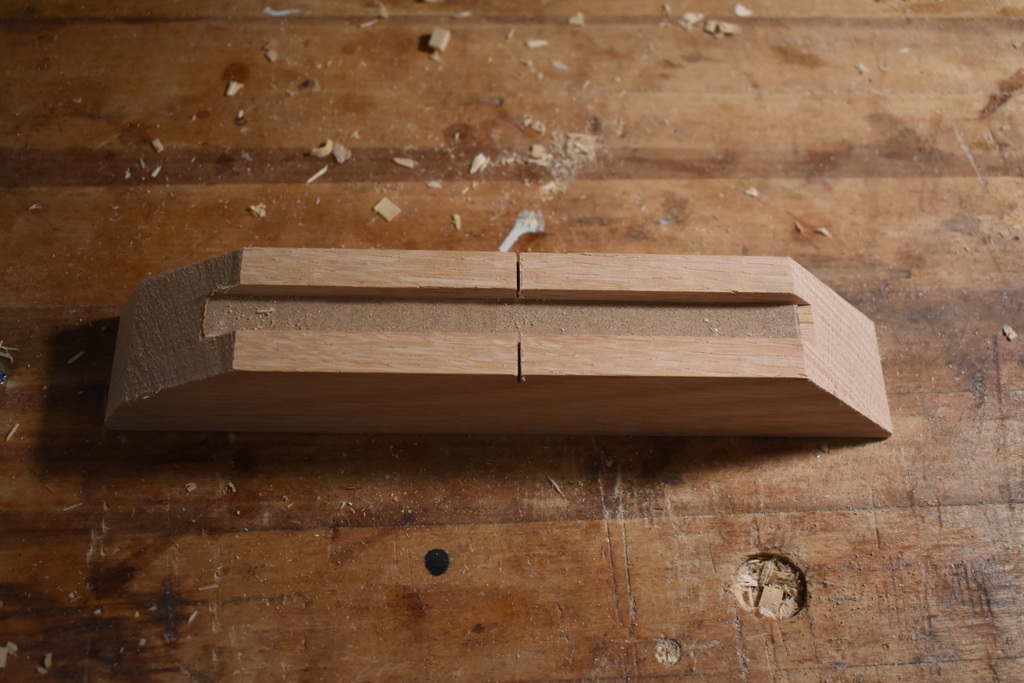
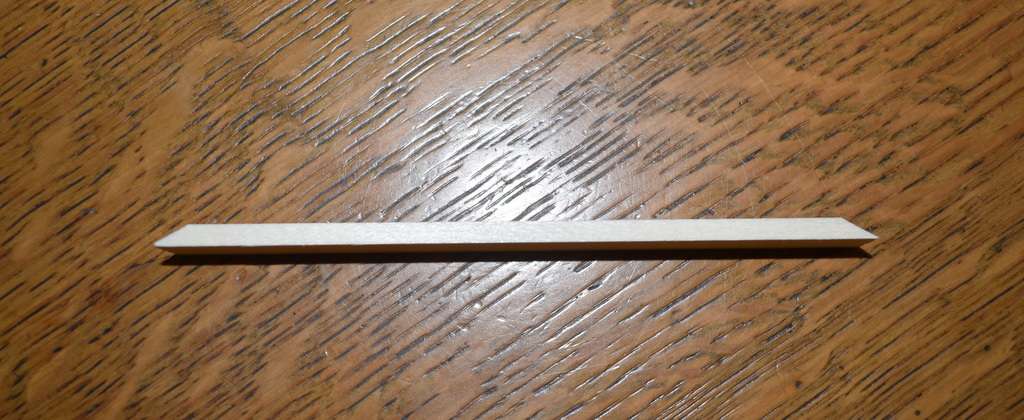
The pattern consist of a square frame made of 1/4 by 1/2 inch sticks, and inset pieces made of thinner stock. You do the frame first, then build up the pattern. More specifically, the frame is made from six pieces, each of which is notched on one side in three places so as to press-fit together. Easier to understand by looking at a piece. This is one I broke because I pushed it together with the joints too tight and had to get it off with a little to much force. You generally plan to throw one or two away as part of the learning curve.
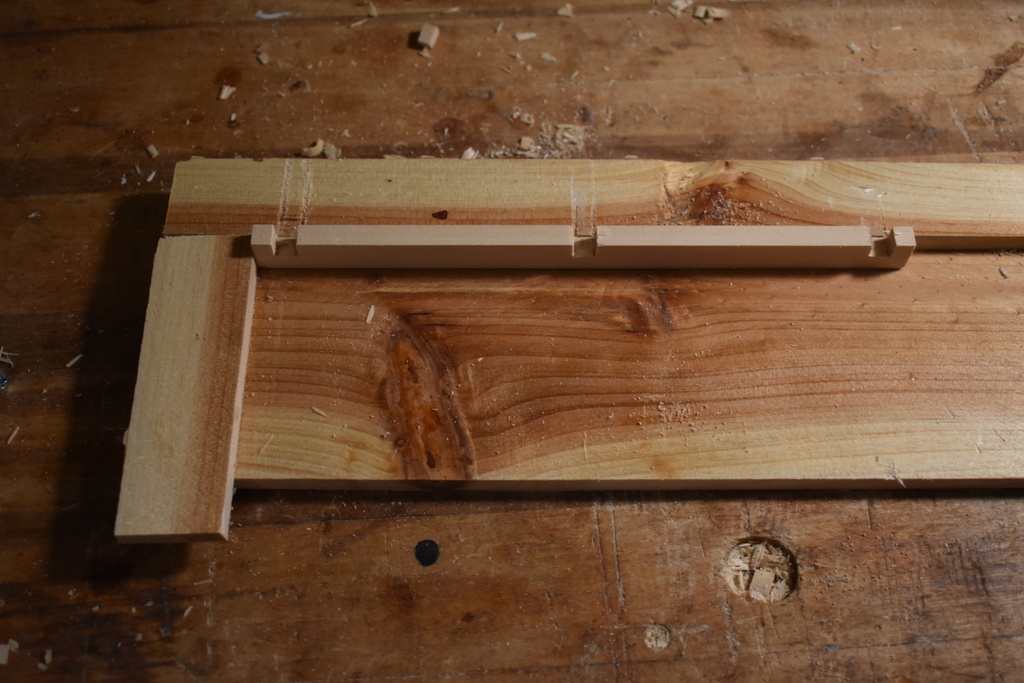
So, you can see that what we have here is a stick with three 1/4 inch square notches in it - one in the middle, and one 1/4 inch in from each end. And if you had two of these at right angles, one with the notches up and one with the notches down, they would interlock. These are made by scribing six lines with a marking knife, then cutting down with a ryoba (in my case) or dozuki halfway though at each location. Then, you use a 1/4 inch chisel to remove the waste. The jig is a big help here. Not much to it - a flat surface, a stop on the left hand side, and a fence along the back that is 1/4 inch high. Normally, you do all six at once as I did, but I will just show this with the waste piece in place.
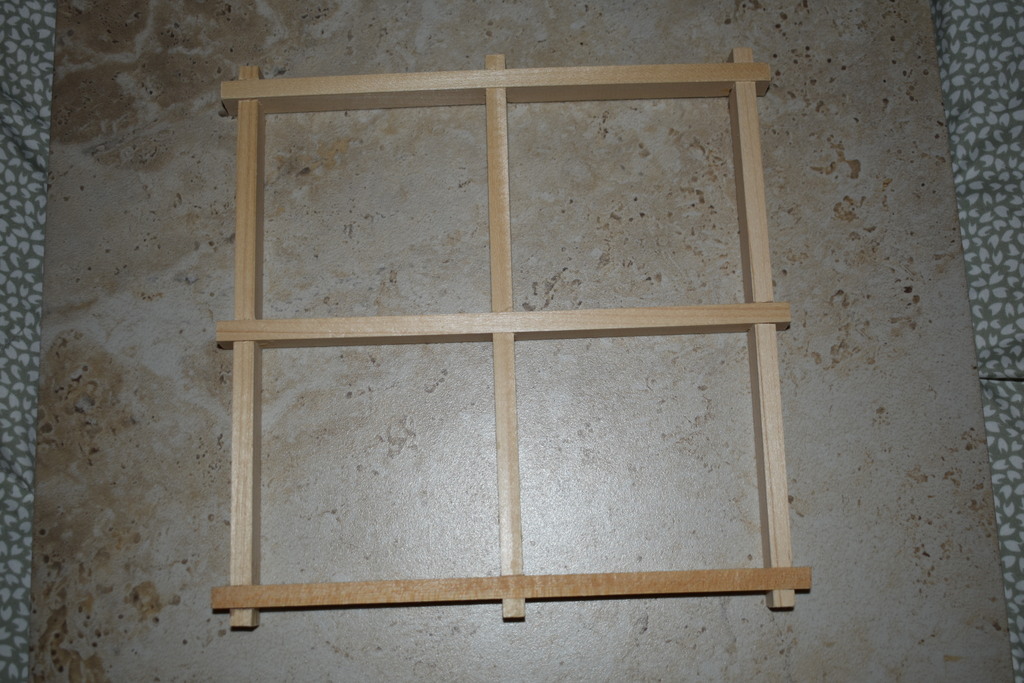
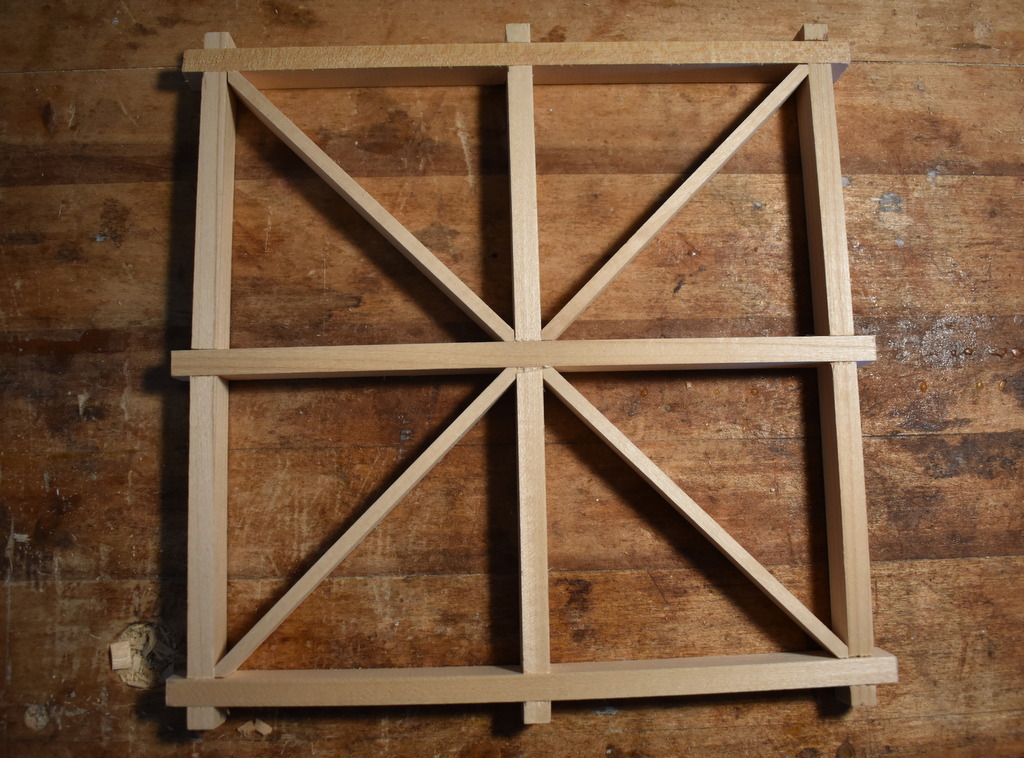
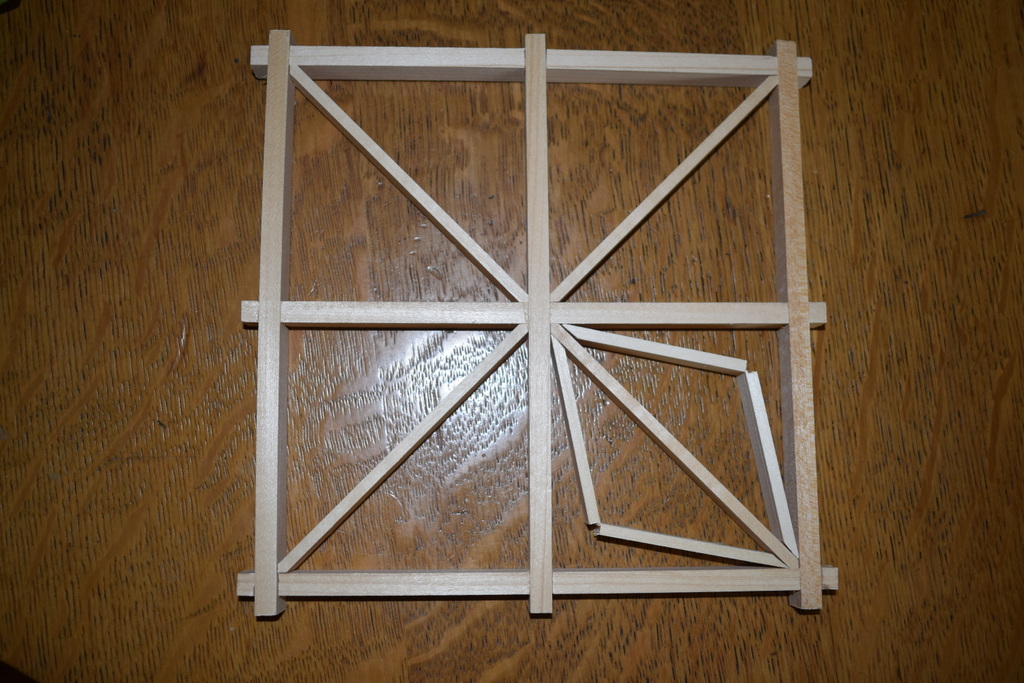
And, of course you spend a great deal of time tweaking the notches with the chisel to make them perfect. When they all fit together correctly, you have a grid like this.
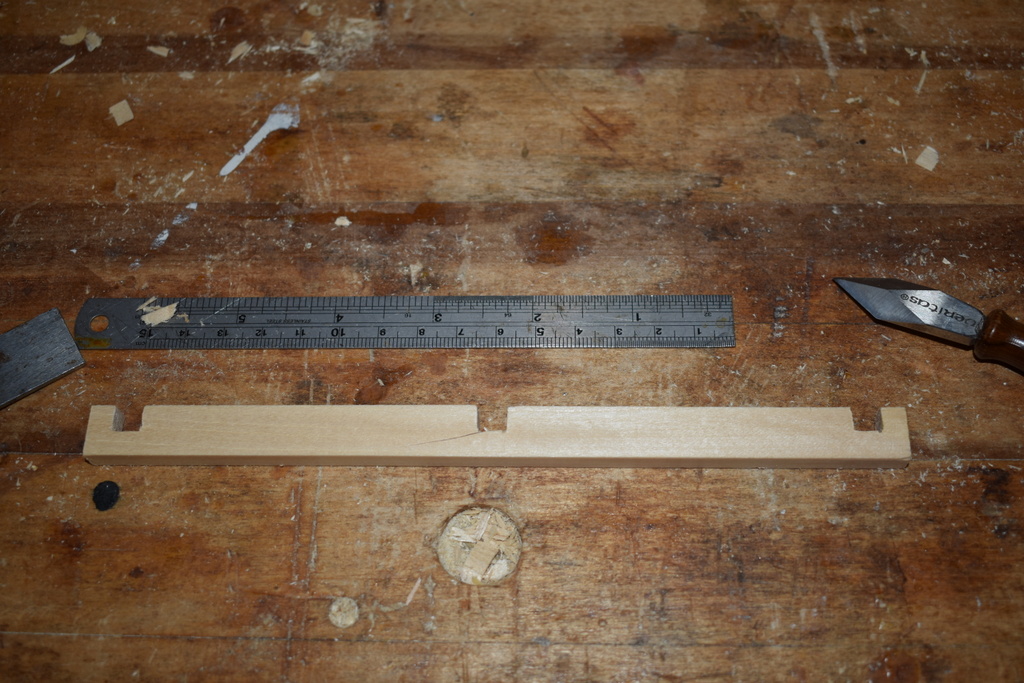
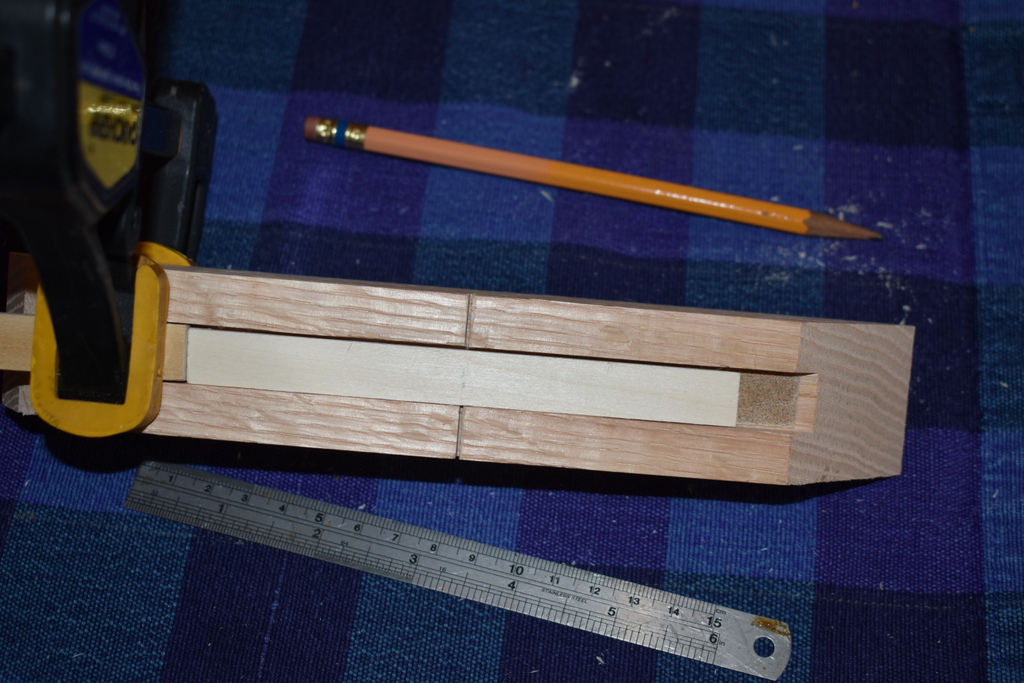
The next step is to make diagonal sticks from the thinner stock. You cut them to length, then pare the edges into a point using a chisel. To do this, you need a jig. I bought a length of 2 x 2 oak, cut off about 10 inches of it, and made a 45 degree bevel on one end and a 30 degree bevel on the other. This is pretty much the only use of a power tool in this whole project. You make a 1/4 inch wide slot in the top to hold the pieces while you make the ends pointy. There's a narrow strip of sandpaper in the slot to hold the piece while trimming. There is a slot cut in the middle which will be used in phase 3 as a saw guide.
I use an old Buck Brothers chisel about an inch wide for this step; the size is not critical but just needs to be bigger than the width of the wood you are trimming. You cut a piece just slightly longer than the diagonal measurement of one of the squares in the frame, about 4.5 inches. You then put it in the slot and pare off the ends to make it come to a 90 degree point at exactly the right length to fit into the frame.
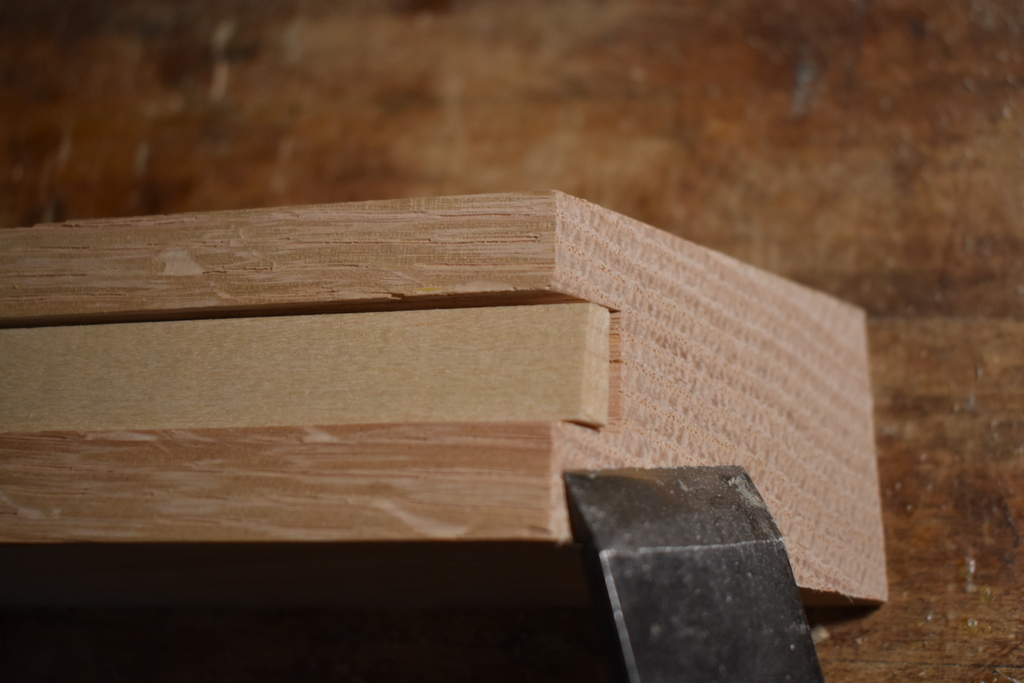
Since I am a newbie at this, I approached the final length incrementally, checking it often. Just make sure that each end comes to a point where the two 45 degree cuts meet. Symmetry is important.
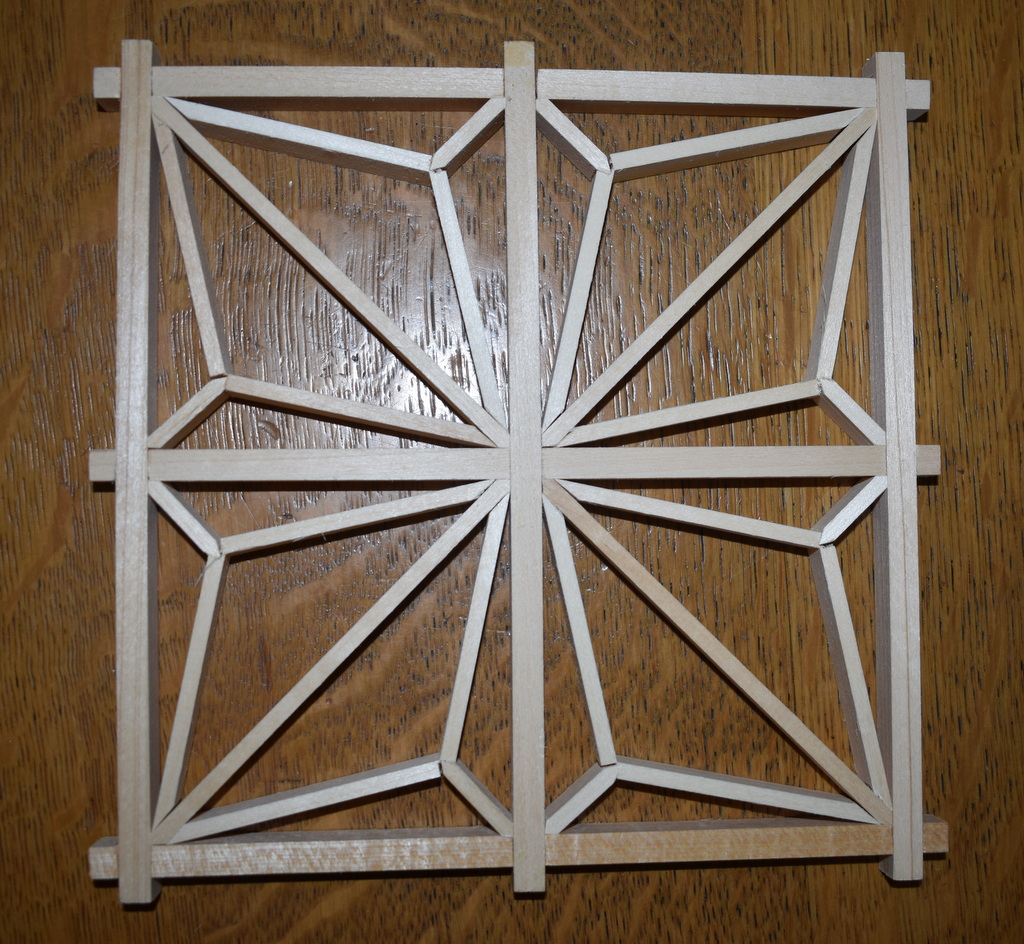
When you have made and inserted four of these, you have this. Now on to the hard part.
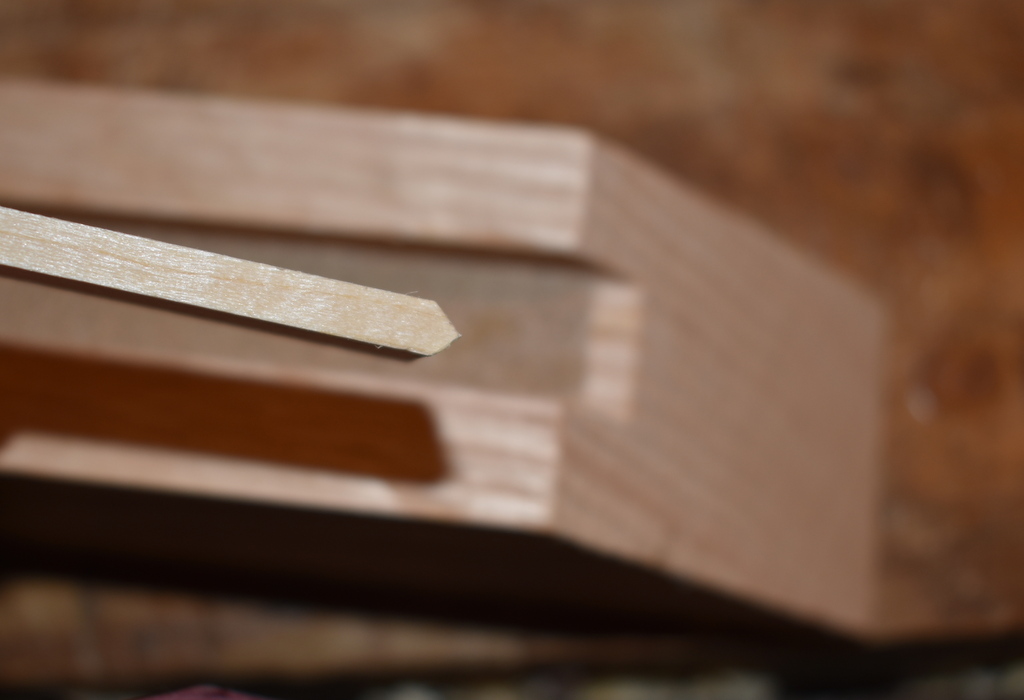
The challenge here is to make eight sticks of the thinner material to go in each of the triangles in the last photo. Each stick is tapered to 30 degrees on both ends, but only on one face unlike the last pieces that came to a point in the middle. Then you slice it nearly through in the middle so it can bend. Too little and it will snap when you try to bend it. Too much and you will have two short sticks instead of one long one. Again, you pretty much have to be perfect. So we start by cutting eight pieces of thin material just over five inches long (I add about a sixteenth). Then we use the 30 degree end of the jig to pare them down to a point. You just try to make them identical.
Now we are going to make the cut that allows the piece to bend. This is made in the middle of the long side. The shorter (bevel) side will be facing the diagonals made in phase two. Since the new piece is longer (5 inches vs 4.5 inches) it will have to bend to fit in. Of course, it has to bend away from the diagonal. So, we start with eight identical pieces that look like the picture above. If they are all the same length as they should be, we can make our paring jig into a sawing jig with a stop block positioned to make the cuts repeatable. You start by drawing a line in the middle of the longer face of one piece. You then position the stop (here, just our infamous waste piece) so that the mark aligns with the kerf when you insert it into the slot. You then reverse the piece to make sure that the mark aligns with the kerf no matter which way it faces. In other words, it's really in the middle.
Now, being excruciatingly careful, you use your fine-tooth saw to cut most of the way through. The first time, you really have to sneak up on it since you have no idea how many strokes this will take. Answer: about two plus a little trimming. Just remember that phase four will require a bunch of short pieces, so the wood will not go to waste if you mess up. What happened for me was that I got very slightly deeper each stroke. The video points out that if you push the saw instead of pull it as would be normal, it just scrapes away a little material. And then you apply a bit of pressure and - SNAP. Any you of course think OMG I broke it.
But it didn't break. It really worked. You are supposed to place your thumbnails on either side of the bend as you apply pressure to the ends from the away side, which I of course forgot. Worked anyway. I remembered the second time and it was a bit of an improvement. Or not as terrifying since I had done it once already.
Repeat this three more times and it will be time to move on to the last step.
The last thing to do is to make the eight little sticks that span from the bent joint to the corresponding corner of the frame. These are nominally an inch long, but I just cut everything to fit what is already there. Like the diagonals, they have two centered bevels on each end to mate with a joint. Unlike the diagonals, they are at different angles. The ones that go into the 90 degree corners are, of course, 45 degrees on each side. But the ones that mate with the phase three pieces are 30 degrees on each side. Rather that make them all at once, I prefer to test fit each one to its final destination. The video suggests that you should start with the 60 degree end, put it in place, and use the marking knife to see where the 90 degree end should be. So you can make all the 60 degree ends on the eight pieces, then make the 90 degree ends to get a perfect fit. Speaking of which, this is the time to ensure that the folded "leaf" parts fit properly into their corners. If there is a gap, it's because the piece is slightly too long. So this is a good time to trim it for a good-looking fit with the intersecting pieces. We do that first, then fit the short locking pieces.

In the above picture, you can see that the length should be a bit under 15/16 inch. But since we have not yet trimmed the leaf pieces, we will just make everything an inch and work from there. As we all know, it's easier to make a stick shorter than it is to make it longer. A tighter fit from shortening the leaf pieces will mean the locking piece has to be slightly longer.
There is a lesson to be learned here about exact measurements when making something that has to fit this precisely. The original pattern says that the leaf pieces should be five inches long, or each half after folding should be 2.5 inches. Mine were slightly long by maybe 1/32 inch. So each half was about 1/64 inch too long. And the angles just looked bad; they did not really seat properly because of this. To make everything fit into the interior and exterior corners, they really had to be exactly 2.5 inches. So, back to the trim jig and get everything the right length. You would not think 1/64 inch would make that much difference. It would just lead to a "fatter" leaf and you could compensate with the locking pieces. But with this kind of pattern it does matter. Luckily, too long is easily fixed.

The above picture shows a final length locking piece, right angle on the right. This fits the gap exactly, but there are sime minor issues with the left side that interlocks with the folded leaf piece. The lock piece is fine, but what needs to be considered is that the piece it mates with is sawn and therefore a bit rough. I could clean up the faces very carefully, but there is a serious danger of slitting the piece open. I accidently dropped one and it fell on a hard surface and split. No big deal to replace it, but these things are rather fragile. So I will not mess with the gap.
My proposed solution to this issue is to acquire a new tool (what a surprise). I am planning to get a very fine tooth dozuki for the next project. My ryobi is fine, but I use it for 2 x 4s, hardwoods and such and it's probably a bit rough for this kind of work. Anyway, done. I ordered a book with a bunch of new patterns to think about.