Or, Ken Greenberg makes a box as a graduation present for his future daughter-in-law.
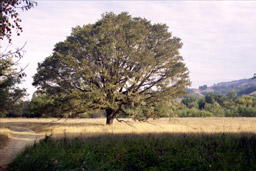
OK, maybe a bit much. Get rid of all those branches and leaves, make the trunk into logs, split them into sections (quarters work well) and let them dry for a while (one inch per year is a good rule). Once you have some dry wood, it's time to move on. The true story is that Tim Swihart gave me a piece of lacewood from a tree he cut down a while back. This piece of lacewood has been sitting in my shop for at least two years, waiting for a project. But I could have started with a tree, if I had more time.

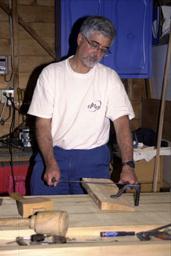
The hard part here is to reach a good compromise between where the wood wants to split and where you want it to split. You need to split it so that each piece is big enough for what you want to make. You place the log on end and carefully align the froe (as seen above) to give you a big enough section. You are making wedge-shaped sections, so the small end has to be big enough for the desired thickness. Alternatively, a big log will allow you to trim away the narrow end if it's too thin. The froe is sharp on the bottom - you keep one hand on the handle to keep it in position, and whack it on the end (where my hand is in the picture) with something heavy to drive it through the log. This allows the wood to split along natural boundaries. If you don't do this, the wood is prone to twisting as the stresses are released. The proper tool for froe-whacking is a maul - a very large mallet often made from a tree root. I just use a section of 4 x 4, as it is heavy enough to drive the froe through lacewood, at least.
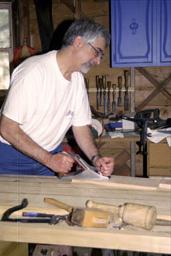
Here, you can see how wedge shaped the board really is. It has quite a bit of twist, as well. It is clamped to the bench with a holdfast, and the high parts removed with a drawknife. This is another edge tool intended for rough work. The sharp edge here is pointing to your body as you draw it towards you through the wood. For a larger piece, you might need to shape it a bit with a hewing hatchet first to get close. This is an incremental process, and you need to choose the right tool for each stage. In this case, no hewing was necessary since the piece was pretty thin already. You flip it over and work both sides and both ends until the sides are approximately parallel. By removing the wood on the high corners, twist is eliminated.
A sequence of planes is used to make the board truly flat and to have parallel faces and square edges. A scrub plane is traditionally used first to get close, but is often skipped on thin stock since it is too aggressive. A fore plane or jack plane is the next step, and gets you relatively close. A smoother (shown above) finishes the job. There are saws involved too, since you are cutting the wood to size as well as flattening it. But in this case, the part of the board to be used for the box sides has not yet been determined. How close do we get to the sapwood? It depends on the grain, and you can't see that until it is planed into visibility.
There is a traditional sequence to squaring a board involving creation of reference faces and adjusting everything to them. The mnemonic device used by cabinetmakers and joiners is FEWTEL - Face, Edge, Width, Thickness, End, Length. Over time, this has proven to be the best method of stock preparation. One the stock has been prepared for the sides, it can be mitered to form the box.
OK, a 30-inch long saw may be a bit much for a half-inch thick piece of wood. It works. This is actually a two-step process. The saw gives a good approximation of a 45-degree angle at about the right length. The tuning process involves a miter trimmer, another hand-powered tool that slices off incredibly thin shavings to produce a perfectly smooth (and properly angled) corner. This is an iterative process - you work all four pieces until they work together.
At this point, you also need to plow a groove for the bottom of the box. A plow plane is the traditional tool for this, although I sometimes use a groove plane (half of a set of tongue-and-groove match planes) since it requires less setup. If I have one the right size and offset from the bottom, I usually reach for it first. The bottom of the box floats in the groove and is not glued down so as to allow for movement. In this case, it was made from some thin plywood stock since it was going to be covered anyway and it lends additional stability. Plywood is dimensionally stable, unlike solid wood which exhibits seasonal movement.
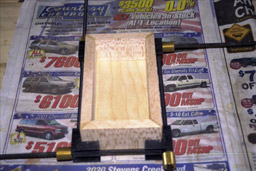
There are several clamping methods that I use. For small boxes, the Lee Valley picture framing jig works quite a well. Don't forget to cover your bench with newspaper first, or the box will stick.
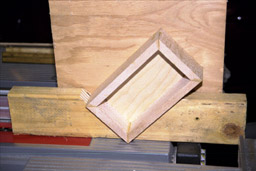
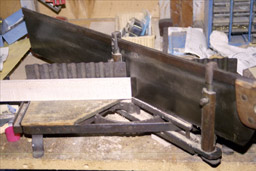
This is one of the few steps in the process where a power tool was used. The box is placed in a key-cutting jig and run over the top edge of a spinning table saw blade. This cuts a very uniform slot in each corner. The sides will be parallel and the depths of all slots will be the same. It might be possible to do this using hand tool methods, but I haven'y figured that one out yet.
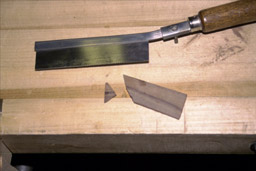
The keys for this box are cut from very thin strips of walnut (about 3/32 inch) to match the top. The keys are mostly for looks on something this small, but keying a miter joint provides additional strength as well. It is important that the key is oriented so that the grain runs across the joint. If you don't run the grain that way, the corners will break out when you trim it. You will then have to cut out the old key and make a new one, slightly thicker. Don't ask me how I know this.
One the keys have been glued in and the glue has dried, they are trimmed approximatley flush with a small saw (like the one shown, which was also used to cut them into the triangular shape) or a sharp chisel. A final pass with a smooth plane will get them flush, but in this case the box will have tapered sides. That needs to be done first.
I don't have any pictures of the top being made, but it is a relatively similar process to shaping the side pieces. For this box, I started with some walnut 4/4 stock I had in the wood rack, rather than cutting down my neighbor's walnut tree and waiting a few years for it to dry. It is made the same size as the outside diameter of the box, and a rabbet is cut around it so that it fits snugly into the box itself. With the top inserted, the box itself was tapered about three degrees. This is another power tool operation, so I don't have pictures. It could have been done with planes with some diffculty, but I think I'll stay away from tapered boxes in the future to eliminate the temptation to reach for a switch.
The interior of the box includes a replaceable insert that sits over the bottom. It is a small piece of thin plywood with a very thick cloth sewed around it. My wife Mary made this part. The idea is that if the cloth should ever wear out, it can be replaced. Also, it hides the piece of plywood in the bottom when the box is open. It keeps the jewelry from coming into contact with the bottom of the box itself, and providing a cushion if you should drop something and be lucky enough to miss the edges.
There are no pictures of me wiping innumerable coats of shellac on this box. It's just not all that interesting to look at. I will describe it, though. After taking one last pass with planes over the external surface and giving it a light sanding (which seems to make shellac adhere better for some reason), three coats of lemon shellac were applied. This was about a one-pound cut, for you shellac enthusiasts. I want to build up a pretty good layer, so I generally brush it on for the early coats. The inside is a little harder, and I used Q-tips to get shallac into the inside corneres. After the three coats were dry, I fine sanded the box. Shellac tends to raise the grain a bit. I then applied anoth three coats by wiping it on, and let the box sit for a week to thoroughly dry out the finish. Once this was done, I levelled the finish with wet-dry sandpaper and mineral oil, wrapped around a cork block. This was repeated with an even finer (about 1000) grit wet-dry paper and mineral oil. Finally, the finish was rubbed out with rottenstone and mineral oil, using an old T-shirt.
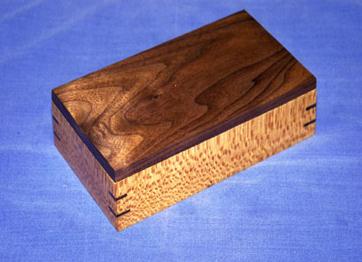
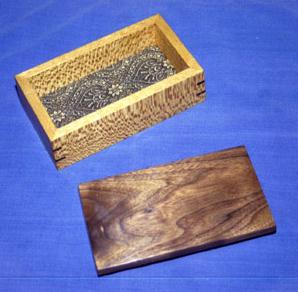
These views show the box with and without the lid. You can barely see the taper (it isn't much) in the closed box picture. The shellac brings out the grain of the lacewood quite nicely. The top really isn't two different colors - it just reflects the light in interesting ways. Is the grainly end lighter or darker? The pictures give two answers, but it's really the same color.
A long journey from tree to finished box, and a good learning experience along the way. Congratulations, Erica. I'll make a more interesting one for your graduation from law school....
Much credit for the design of this box goes to David Freedman, whose book on box making provided quite a bit of guidance along the way. I started the process a bit earlier than he does, and I use hand tools wherever possible, but the basic design is from the book with very little modification. A great resource, and the right starting point for us novice box makers. Highly recommended. As noted elsewhere, I learned much about finishing with shellac from Jeff Jewitt's web site, which has allowed me to improve my technique quite a bit in this area. I wish the pictures were better - they don't show how well this really came out.