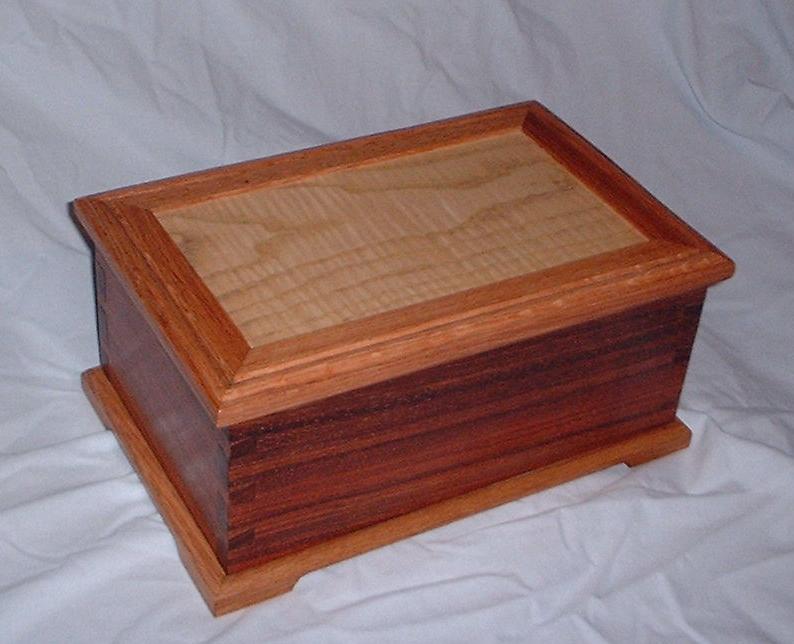
This box was made for a gift exchange at the South Bay Woodworkers 2002 holiday party.
Wood: Borire (tropical hardwood), red oak, red oak and white oak veneers
Finish: Super-blonde shellac, wax. Two coats of shellac brushed on, sanded to take care of the grain-raising effects, four more coats padded on, let dry for a week. Wet sand with mineral oil and 320-, 400-, 600-, and 1000-grit wet/dry paper, rub out with mineral oil and pumice, then with rottenstone. Wax lightly.
Oldtools used: The usual array of saws, planes and chisels. A toothing plane was used in the veneering, and a complex English moulding plane was used to add visual interest to the outside edges of the top. Rasps for wood removal in places.
Lessons learned: This was my first attempt at veneering, and it worked out pretty well. My only complaint was that a bit of color from the yellow glue used was picked up by the white oak top panel. Next time I'll use white glue. Also, red oak was readily available as scrap and was the only wood at hand that made a contrast with the borire that I liked. I won't use it in this application again, as the moulding plane work and matching the corners was just too hard. The right way to do this is to buy all the wood together, not depend on whatever is in the scrap bin.
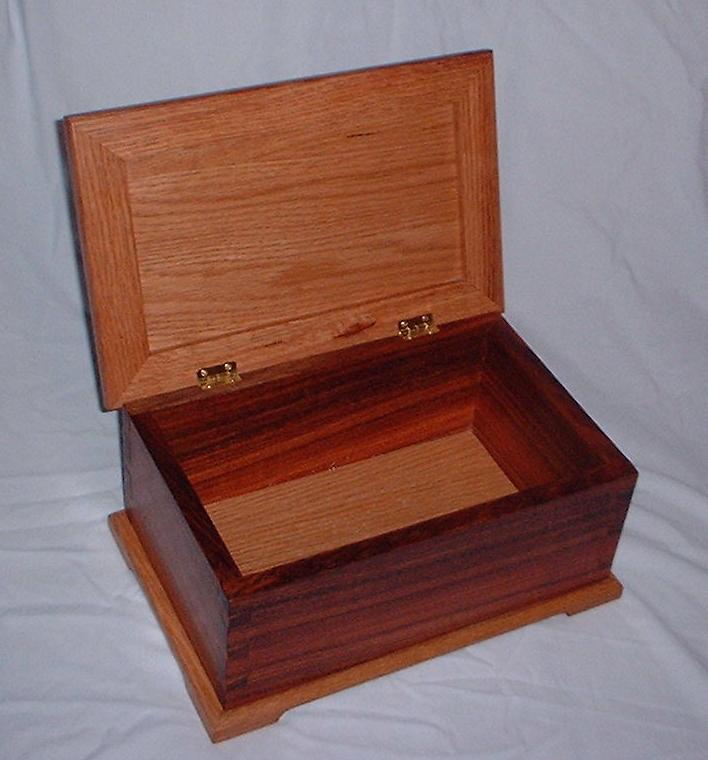
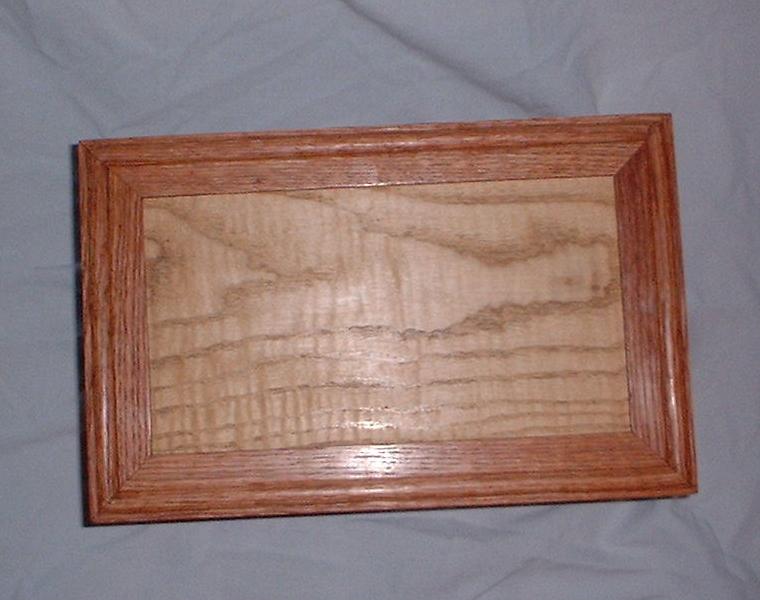
Remarks: A good number of design issues had to be resolved here. There were a few things I knew I wanted to do, including use a particular piece of wood I had picked for this box. It was wide enough to make a taller box than I am used to, and I wanted to make the box part be a "golden rectangle" in proportion. The overall dimensions are 11 1/4 x 7 1/4 x 5 after the top and base are added, which is no longer in exactly the correct proportions but still looks good. The height exceeded the capacity of the miter trimmer, so I went with dovetailed corners. I was in a bit of a hurry and did not want to address the various methods of floating a bottom panel in a groove, so went with a different approach - a separate base with the box bottom inserted in a rabbet in the base. The box sides are a rectangle open on both top and bottom, and are glued to the base so that the top of the assembled base unit becomes the bottom of the box. The separate base is large enough so that feet can be created by using a Forstner bit about two inches from each corner and (with a coping saw and rasps) removing material from the part between the holes back to a line connection the top of the holes. Look at either of the first two pictures and you can probably figure out how it was done. The top is a frame with an inserted panel. The top of the panel is white oak veneer to provide contrast to the oak and borire, and the bottom is red oak veneer to make the top and bottom of the inside match when the box is open. The fact the the top overlaps the sides in the back restricted my choices for hinges. I ended up using some relatively simple (and a bit too small) stop hinges, set into hinge mortises in the top of the back of the box but flush mounted to the top. This seems to work OK, but I will probably change the design on the next one of these to use a different kind of hinge.
![]()
![]()