It takes a reasonable assortment of tools to build furniture if you're a galoot. You will need a few bench planes for the basic work, and molding planes if you want to get fancy. You will need chisels, saws, scrapers, shaves, and an endless supply of clamps. There's always something else you can find to buy at garage sales and flea markets, and we are lucky to have a number of people turning out high-quality new "old" tools these days.
Planes are probably the place to start, though. I started with a block plane that I bought from Sears for planing doors. Tuned up, it works quite well for many purposes; now belongs to my son Dan and lives in Burlington, VT. I then added a modern (60's) era Stanley jack as my first bench plane. It's still around too, only now it is used more as a "scrub jack" for rough work. I acquired other metal planes as needed for projects. The wooden molding planes started as part of my heritage set (see below). Recently, I have been trying to rebuild the working set of molding planes by acquiring planes as bargains turn up. The current plane list now includes 25 metal planes and 50+ wooden planes. Clearly, the woodies have taken over.
NOTE: As some folks in the woodworking community know, I just moved to Santa Rosa. The following pictures are from the old shop in Los Gatos. I am now in the intermediate shop, which I will inhabit for the next year or so while I build a whole new one from scratch for hand tools only. I may get around to doing some pictures of the intermediate shop (a two car garage) but it's probably not worth the effort since the tools are the same, just the storage is different. Expect to have a whole page devoted to the new shop (starting in the Spring of 2004) at some point in the future.
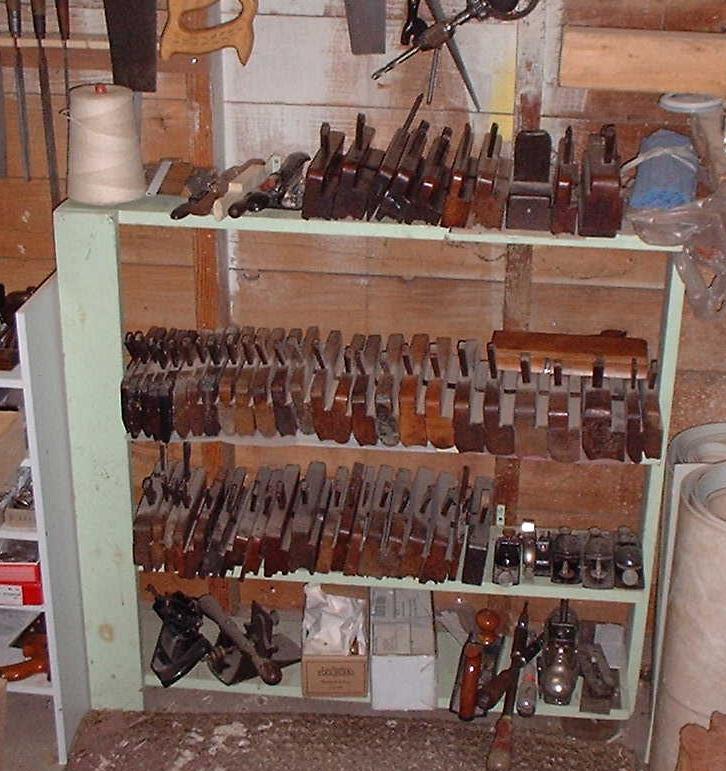
This is a picture of the shelf o'planes, which now contains the woodies and the specialty metal planes. The bench planes are under the bench (see below). The top of the old bookcase has a number of English moulding planes I brought back from the UK in the Spring of 2002, as well as spokeshaves and a roll of auger bits. The woodies on the second shelf are all hollows and rounds, almost all pairs but not necessarily all matched. They start at 1/4 inch and go up by eighths through about 1 1/2. The third shelf has other woodies - match planes, rabbets, beads, etc., a Stanley #92 shoulder plane, Millers Falls bullnose rabbet, and a bunch of block planes. The lowest shelf has the #78 duplex rabbet plane, two Lie-Nielsen planes (164 low angle smoother and 140 skew rabbetting block plane), a Windsor beader, and push drills and ratcheting screwdrivers. I like to keep these low so they do not fall off anything in the event of an earthquake.
Most of this stuff used to be on the shelf o'planes, but has now moved off into auxiliary storage, Got to make a toolbox one of these days. Actually, there will be three, not counting the portable tool chest that belonged to me wife's great-grandfather Montague Davys. One under bench for the bench planes, one for the molding planes, and one for everything else, probably wall mounted. Oh, and a saw till. Can't forget the saw till.
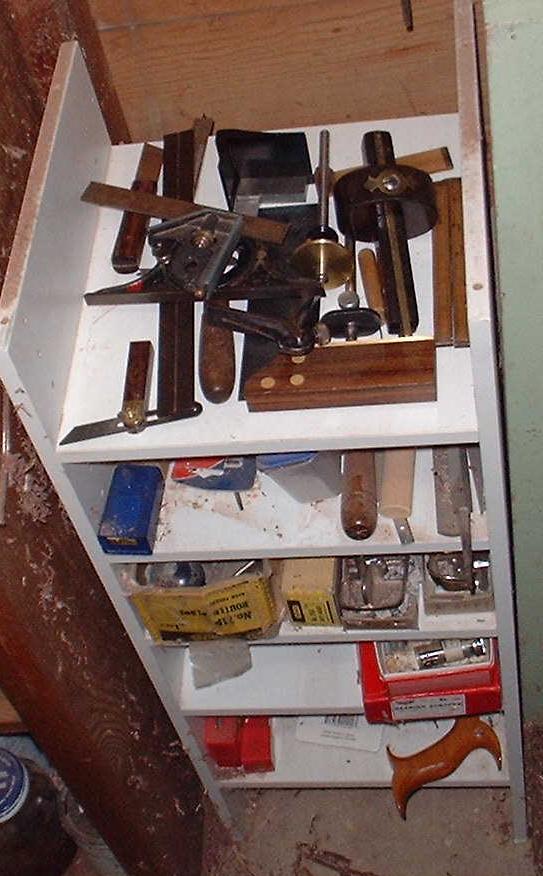
Anyway, this section has all the marking and measuring tools on top as temporary storage. The second shelf holds small files and saws. The third shelf holds in-box planes - the #71 router, #271 small router, #79 side rabbet plus a #95 butt gage. The third shelf contains a new-in-box set of bearing scrapers (no I haven't used them) and a box of small miscellaneous tool parts like saw nuts, push drill bits, etc. The fourth shelf holds the Independence Tool dovetail saw, again close to the floor so it does not fall far if it falls at all, plus some empty boxes for other tools.
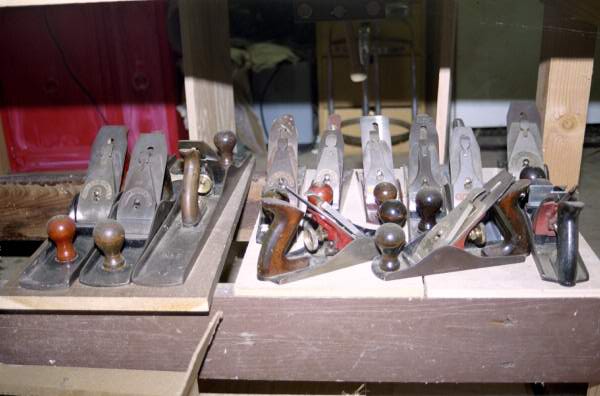
Above are the bench planes, hiding under the bench.
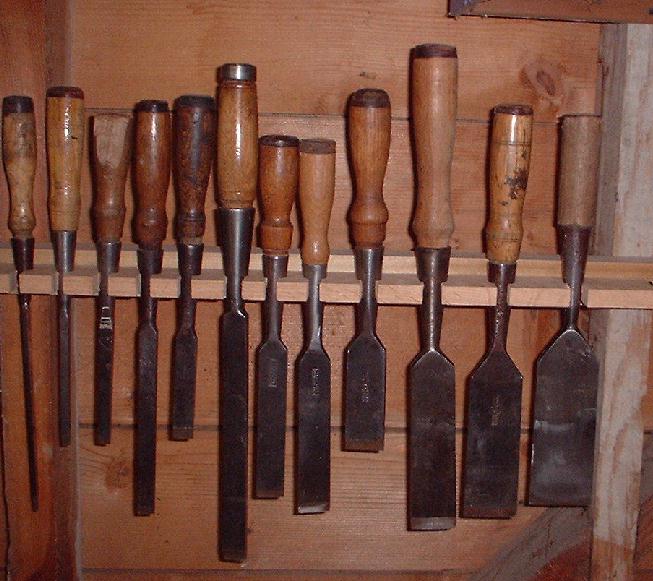
Ah, chisels, we haven't talked about chisels yet. The bevel edge chisels are not yet photographed, but here are some of the ever growing collection of firmer chisels, mostly Buck Brothers socket firmer chisels. The really long 3/4 inch one with the metal ring is a Union, and there is the occasional Witherby or some other high quality brand. I recently rebuilt the rack since I now have a complete working set. A set of chisels consists of 12, from 1/8 to one inch by eighths, then up to two inches by quarters.
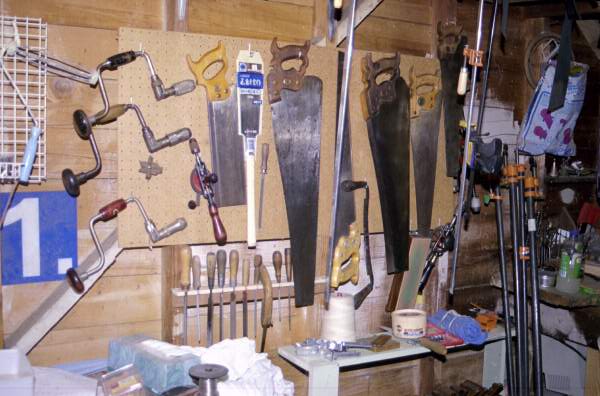
Until I build a decent toolbox, most of the other stuff just hangs around. Here you see most of the saws - Disston (and one Stanley) rip and cross cuts, Spear & Jackson and Harvey Peace panel saws, a Ryoba, compass saw, Keystone backsaw, etc. There is a rack for files at the bottom. Other tools included are a drawknife (Douglass Mfg. Co., the predecessor to James Swan), some drills (see below), a couple of braces, a Stanley #49 auger bit depth stop (between the bottom two braces), and so on. There is another panel this size in a different part of the shop that holds some of the chisels plus marking and measuring tools.
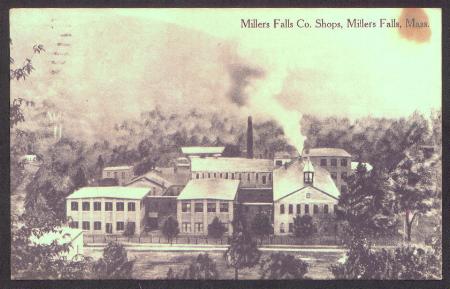
Those folks in the above factory were busy workers and produced the following for me (darn nice of them, too):
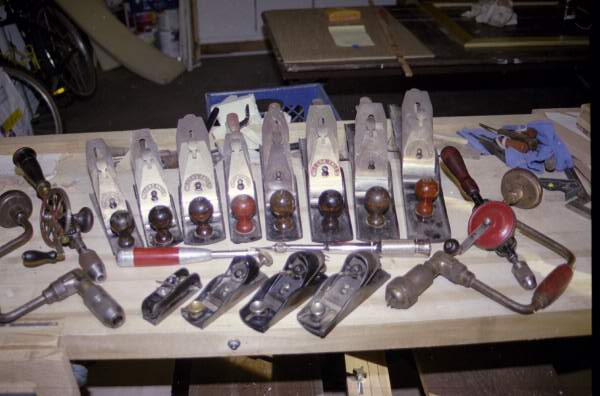
Yes, honey, I really need all these. Everybody's got to focus on something, and since everyone else was always talking about Stanley tools, I decided to concentrate on Millers Falls where I had a choice. (Yes, I have a few Stanley planes, too. But no more than a dozen, I'm sure.) Here we see the Millers Family in all its glory. The bench planes are (from left to right) #8, #9, #10, #11, #14, #15, #18C, and #22C. Millers Falls planes are numbered by their length, although the #8 and #9 are really about equally long. In front of the planes are a Buck Rogers #100 push drill and a #185 push drill. In front of those are a #4 bullnose rabbet plane, and adjustable mouth block planes # 56 (low angle), #16, and #17. To the left are a #2 eggbeater drill and a #732 holdall brace. To the right are a #77 eggbeater drill and a #771 Lion chuck brace. Missing from this picture is a #1 spokeshave (the so-called "cigar shave") that I found in my MIL's basement. Also, the number 57 block plane, which had not yet arrived when this picture was taken.
The natural evolution of tool users is to become tool makers. Often, you reach a point in making something where you need a tool that you don't have. Since the natural inclination of people who like to make things with their hands is to make whatever they need, it's a small step to start building those tools you are missing. I am just starting down this path, having made a few spokeshaves - and now a small smoothing plane. I never was able to find a small smoother that did what I wanted at a reasonable price, so I did what a cabinetmaker would have done 100 years ago - made my own. Since I am a relative novice at this, I started with a set of plans and a plane iron (with cap iron and screw) from Ron Hock (http://www.hocktools.com). The results exceeded my expectations. This plane takes wispy shavings with no tearout (when I remember to adjust the iron properly) and is a pleasure to use. I'm sure it's just the first of many.
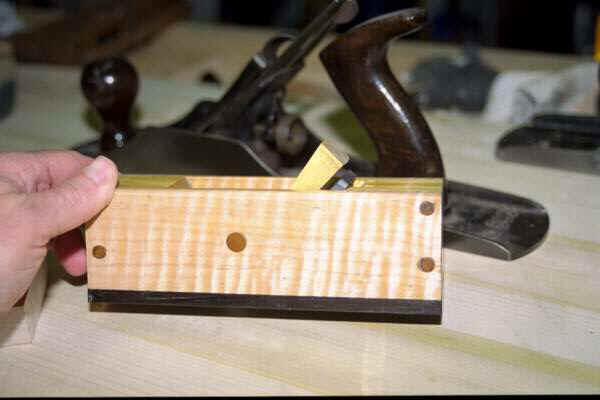
The above picture shows the completed Krenov-style smoother (based on a design popularized by James Krenov) made of yellowheart with curly maple sides and an Indian Laurel sole. Overall length is about 6 1/2 inches. You can get a rough idea of the size from the jack plane behind it.
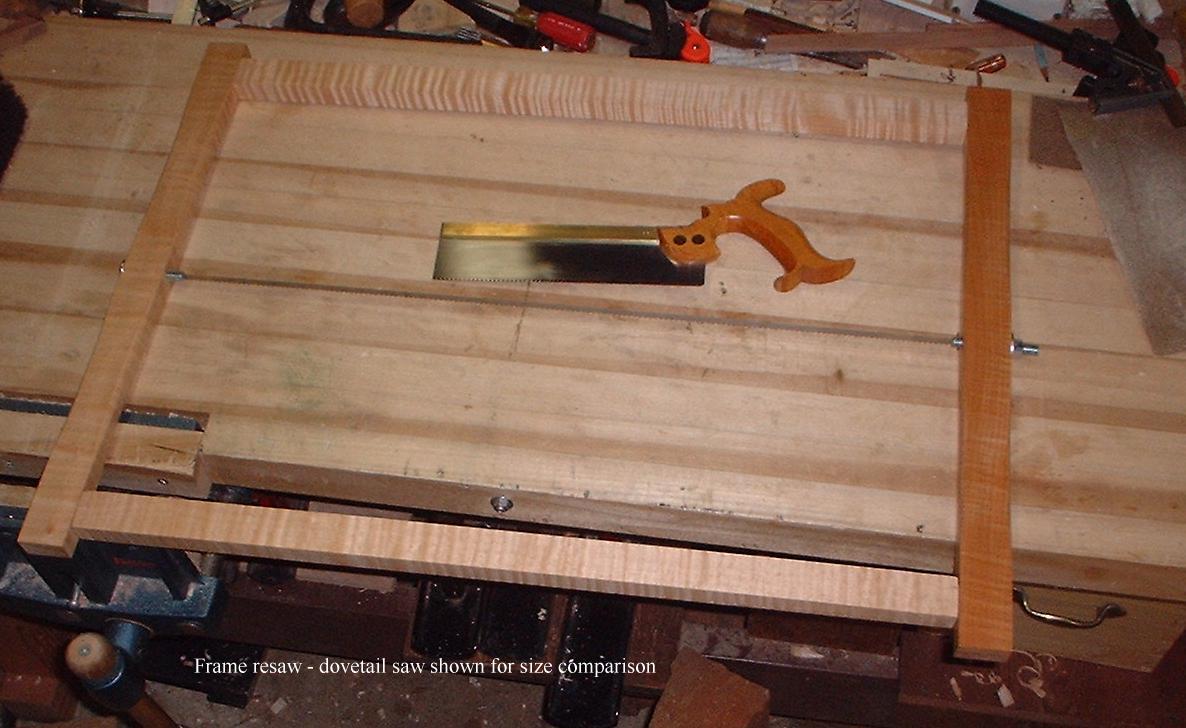
The picture below is my frame resaw, completed in the Spring of 2002. It is used to resaw thick stock (say one inch or more) into panels. This saw is based on one belonging to Tom Holloway, whose saw has been a model for quite a few similar saws in the oldtools world. Mine is made from curly maple, finished with super blonde shellac. Three of the sides were made from the same board - the last piece is darker as a result, but I consider this to be a feature. This way I know which end to pick up. It was originally fitted with butcher saw blade, which worked but took a relatively long time to cut. I have since replaced the blade with a more aggressive 6 TPI bandsaw blade.
We pause to say a word here about maintaining one's tools. Assuming you don't lose them or drop them on the floor, tools will last a very long time. This is one reason why a galoot cringes when he reads (in an ad) "in very good condition for its age." A craftsman takes care of his tools, as they are the source of his livelihood. They are not left to rot in some old barn or thrown carelessly in a box in someone's basement during a craftsman's lifetime. A tool should look nearly as good after 100 years as it did when new, other than normal darkening of the materials through use. The only losses should also be the result of normal use, primarily through sharpening. When sharpened enough times, a saw will disappear, as the sharpening process makes it narrower each time. A chisel or plane iron will get shorter. The good news is that a plane iron can be replaced when it becomes too short to use, prolonging the life of the rest of the plane.
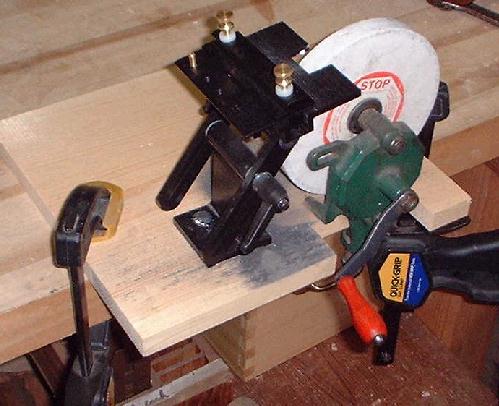
Sharpening of edge tools (plane irons, chisels and the like) is best accomplished through a very slow grinding process. A modern high speed grinder will remove the temper from the iron if you are not careful. This can be fixed by re-tempering, but why bother? A hand cranked grinder is more than adequate for the job, and certainly age-appropriate for sharpening a 100 year old piece of iron. The hard part is maintaining a proper relationship between the grinding wheel and the iron. I like the Lee Valley grinding set for this purpose, here mated to a hand cranked grinder. This is simply mounted on a one foot square piece of pine, and clamped to the benchtop as needed. The board must be notched to allow the grinder (which was originally intended to be clamped to the bench) to align properly with the sharpening jig. A shop-made jig is certainly possible, but this setup works so much better than the shop-made one I had before that I would never go back.
Some of the tools I own were handed down to me through various branches of my family, including inlaws (and perhaps outlaws). These I keep forever, passing them down to my son Dan at some point. They will stay together as a set, and will be considerably enhanced with other acquisitions that replace tools that were lost over time. I should say that they are lost to me as user tools, since some are now in museums.
The largest group of these belonged to Alonzo Stiles, a windmill maker. I had expressed my interest in old tools to Maynard Smith, who has been my mother's companion for many years. (A very interesting guy in his own right, Maynard was one of the meteorologists involved in forecasting the conditions for the D-Day invasion of Europe during W.W.II.) When Alonzo died, Maynard rescued as many of his tools as he could manage to haul away - reportedly, there was a basement full at one time. Knowing of my interest in and respect for old tools, he sent me the following message one day.
I am sending you a box of tools by UPS today. With one exception, they
belonged to Alonzo Stiles, Doreen's grandfather. He was born in Preemption, IL
in 1863, lived most of his life in Randolph, IA and died in Peru, NE in 1950. He
was a master carpenter and specialized in windmills. My family still has the
shaving mug he used at the local barbershop - with a windmill on it.
I inherited these tools by default and none of my own family is at all
likely to make use of them, so have fun.
Fun indeed. I now use these tools as originally intended, and am slowly reversing some of the damage time has done. I will admit to sometimes talking to Alonzo while using them. The contents of the box included an old wooden clamp, a bevel gauge, a Stanley marking gauge, a pair of calipers, two carving chisels marked "HERRING BROS. LONDON" (these are for SWMBO), and eight wooden planes. One of the planes was missing a wedge and clearly had the wrong iron in it, but another was missing the iron and the "wrong" one seemed to make more sense in this plane. There are two rounds, a shop-made hollow, a rabbet plane with an internal depth stop, a simple skew rabbet, a matched pair of D.R. Barton planes that produce a tongue and groove, and the now-ironless fillister. No interesting profiles, but this guy was a carpenter. He probably built the furniture in his own place, but it was likely very functional and not too fancy. There is a brass level (the rare "Helb" railroad level), that I received as a birthday present a couple of years later. I need to take some pictures of that one.
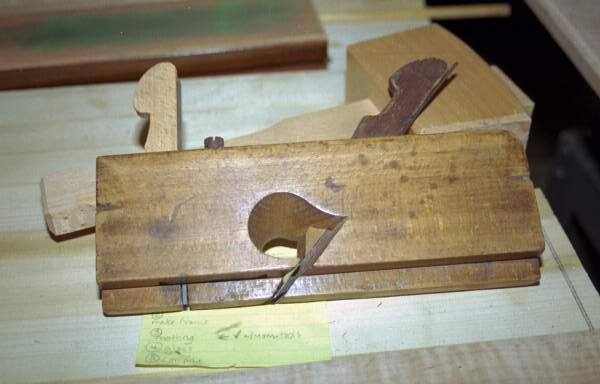
This is one of the planes that I have managed to bring back to useful condition (although it still needs a bit of tuning). The original nicker iron and wedge were missing. I made a new wedge from a cut-up molding plane that had a major split running through it and could not be resurrected. Thus, although it looks quite different, it is probably 100 year old beech, and I took great pains to match the finial shape. The iron is a piece of O-1 tool steel from Ron Hock's scrap bin, shaped and heat-treated by me. Should have been a bit longer, and I may re-do this, now that I know how.

Here's a second restored plane - a Dunham & McMaster wooden plane called (until someone tells me I'm wrong) a standing fillister. Essentially, this is a skew rabbet with a fence and depth stop. Unlike a moving fillister, the fence is integral to the plane and cannot be adjusted. The depth stop may or may not be original - it looks like something that could have been shop-made, which (if true) might change the proper name for this plane. It does work quite well, though. The plane clearly has some damage to the top surface, and is probably only of interest in that is useful and in that it has been in my extended family for so long. As received, there was no iron and no wedge. This one needed the most work, and thus was the last plane to be restored. The black thing coming out of the plane is the handle of a small mallet I use for adjusting irons, nor part of the plane.
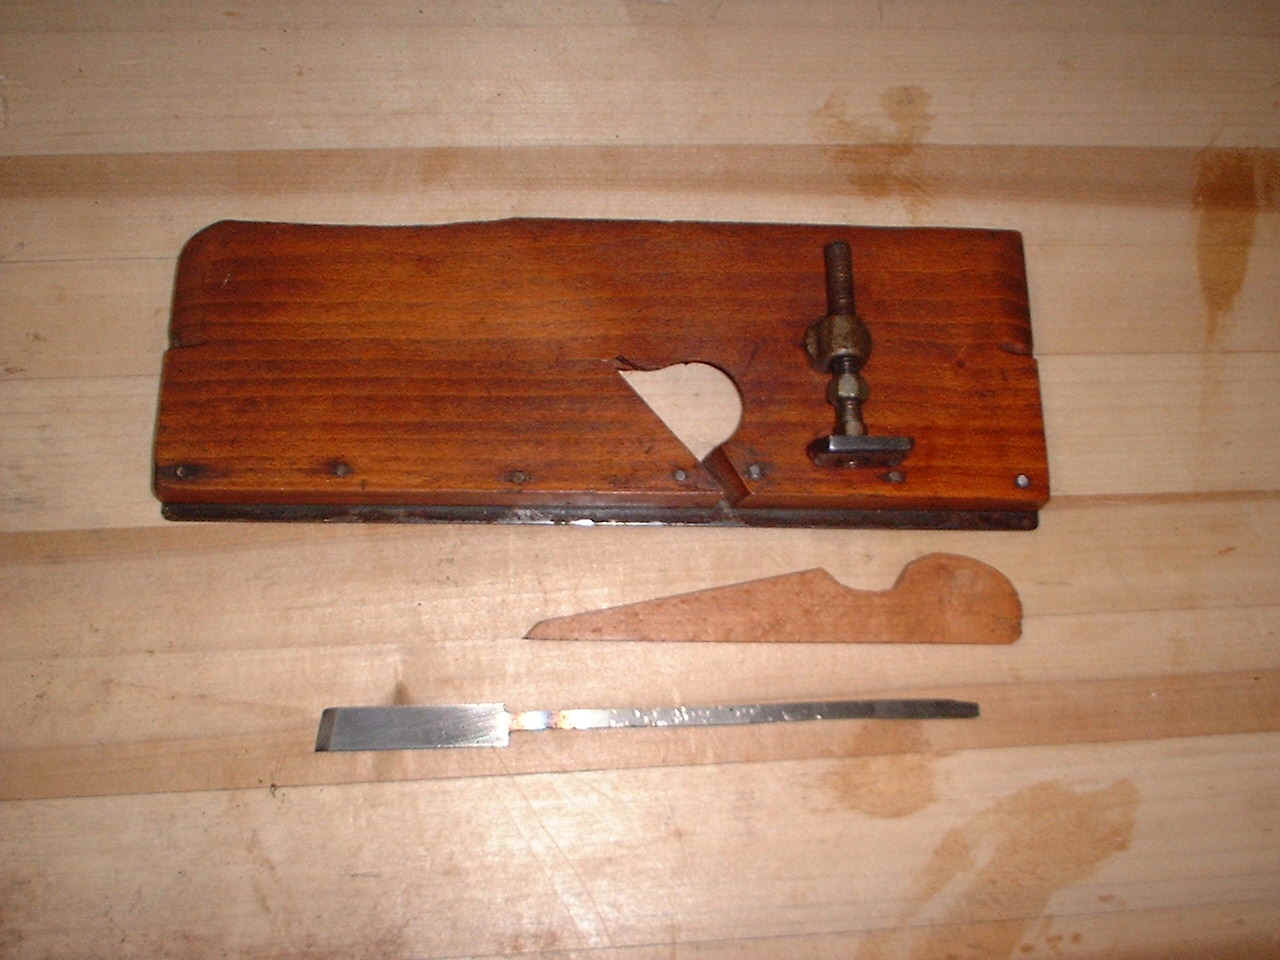
In this photo, you can see the parts I made to restore the plane, as well as the depth stop mechanism. The iron was much more difficult to shape because of the skew of the bed. I did not want to remove any more material than necessary, and the part of the iron that extends through the mortise in the top of the plane is very narrow indeed. It was so narrow that the iron bent repeatedly while shaping and had to be hammered flat again (you can see the marks). The angle of the cutting end was not especially difficult - with the iron shaped enough to lie flat against the bed over its entire length, the part that projected through the mouth was marked and filed to be parallel to the sole. The proper angle of the bezel was then determined more by experiment until it "looked right" than through geometric analysis. It was considerably harder than a non-skewed iron to make. After shaping, the iron was hardened with a MAPP gas torch and annealed in the oven until it was soft enough to be sharpened.
With the iron fitted, it was possible to fit the wedge. The finial shape was taken from a more-or-less contemporary plane. The wedge was made oversized, then inserted into the plane, the high spots noted, and material removed from the areas that were binding. The process was repeated until the wedge fit properly. This sounds longer and more involved than it really is. Once the wedge made good contact along the iron without binding until the tip was well into the rabbet mouth, the fit was judged adequate. The tip was modified so as to not obstruct shavings more than necessary. The body was cleaned to remove the numerous paint spatters, then wiped down with a coat of linseed oil. Although the wedge is very old beech, it will be a long time before it matches the patina of a 120 year old plane.
 On
to another family, my wife's ancestors were among the earliest settlers of
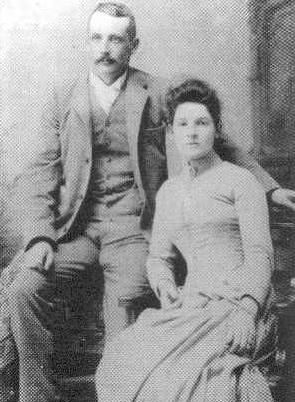
Nelson, British Columbia. Her great-grandfather, Monty S. Davys, ran the Silver
King mine which was the primary source of the town's revenues in the early days
and one of the reasons it was established as a town in the first place. He was
married to Lucy Bate of Nanaimo, B.C.; their picture at left is from around
1900. Their daughter Lilias Davys was educated in England. On the family's
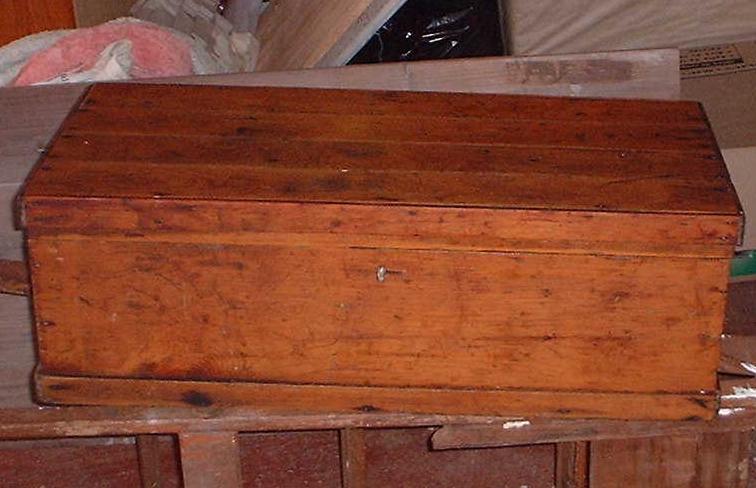
return from England circa 1912, it is believed that Monty acquired the
below-pictured tool chest with a number of tools included. (His ownership is not
in doubt, but the year of acquisition is a bit uncertain.) This was more along
the lines of a homeowner's kit, rather than a cabinetmaker's working set. After
all, he was a mining engineer and later mine manager, not a cabinetmaker. But
the chest survived and was passed down to Lilias Davys Street, who gave it to
me.
On
to another family, my wife's ancestors were among the earliest settlers of
Nelson, British Columbia. Her great-grandfather, Monty S. Davys, ran the Silver
King mine which was the primary source of the town's revenues in the early days
and one of the reasons it was established as a town in the first place. He was
married to Lucy Bate of Nanaimo, B.C.; their picture at left is from around
1900. Their daughter Lilias Davys was educated in England. On the family's
return from England circa 1912, it is believed that Monty acquired the
below-pictured tool chest with a number of tools included. (His ownership is not
in doubt, but the year of acquisition is a bit uncertain.) This was more along
the lines of a homeowner's kit, rather than a cabinetmaker's working set. After
all, he was a mining engineer and later mine manager, not a cabinetmaker. But
the chest survived and was passed down to Lilias Davys Street, who gave it to
me.
As received, the tool chest was covered with paint from years of misuse, and most of the original tools were gone. I spent some time in early 2004 cleaning it up, carefully removing all the paint spots and adding a coat of varnish to preserve it. This vastly improved the appearance of the chest. Under normal circumstances, it contains the beginnings of a portable toolkit for on-site use. Over time, this will be increased, but some of the tools originally placed in the box (by me) have migrated to my son's shop. It does contain a Spear and Jackson panel saw, which is now affixed to the inside of the lid as is traditional. The bottom of the box contains a smooth plane and a double-ended block plane, a brace and an eggbeater drill. The sliding tray includes a set of bench chisels that my son gave me for Father's Day one year. They are modern but seem to work well enough once sharpened. Also a bevel gauge, and a combination square, bits for the eggbeater drill, and various other small tools.
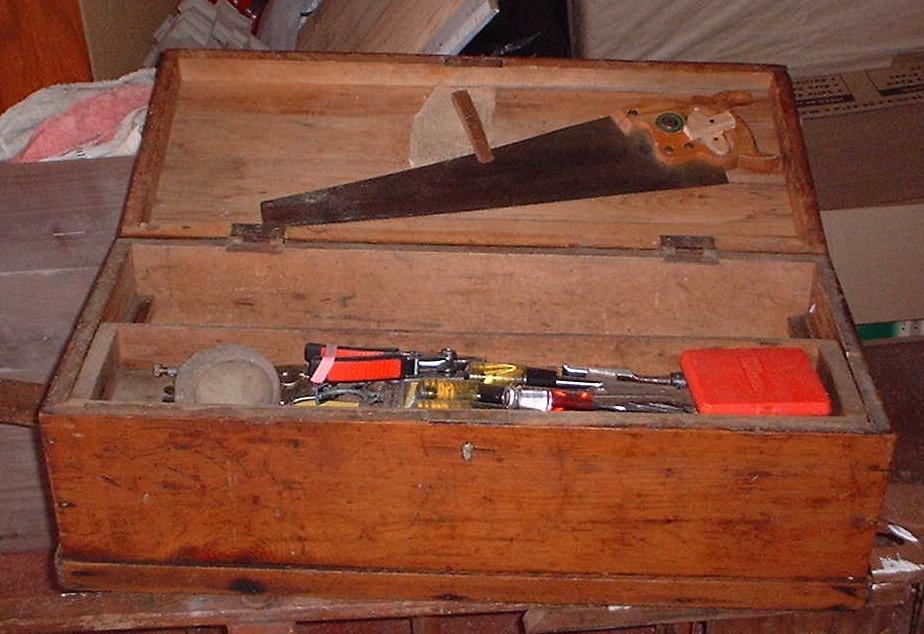

The chest came with a typed list of its contents in the lid, which is a bit hard to read after almost 100 years but is scanned in here. Some of the items on the list map well to the contents of the chest, but I will be adding things to match the original contents - within reason. I don't intend to include a bench vise, for example, as it may be a bit heavy to carry around. A small hand vise may be more appropriate.
I periodically empty all this stuff out so as to load the chest with tools for a particular purpose, such as doing a demonstration that requires a specific group of tools.
Yes, books are tools, too. There are more complete lists of woodworking books available (look around) but this is what I have acquired so far. Many of these form a useful reference library - if I just want to read about tools, I go to the library. The books I have acquired are those I return to (or intend to) when I need to answer a woodworking question.
There is also a web site I have created as a reference for woodworking related books. It includes reviews. It is at http://www.calast.com/personal/ken/booklist.htm. This site is arranged by subject and author.