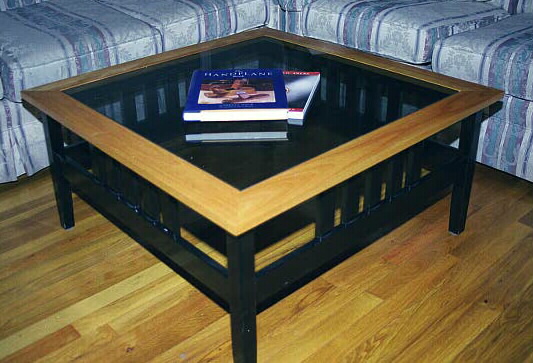
To understand the roots of this project, you need to know that we are part owners of a vacation home on Lake Gaston - on the North Carolina/Virginia border. It's brand new but has a bunch of furniture that got moved there from California. This includes the mission-style coffee table I built back in the South Bay, and a companion end table that matches it.
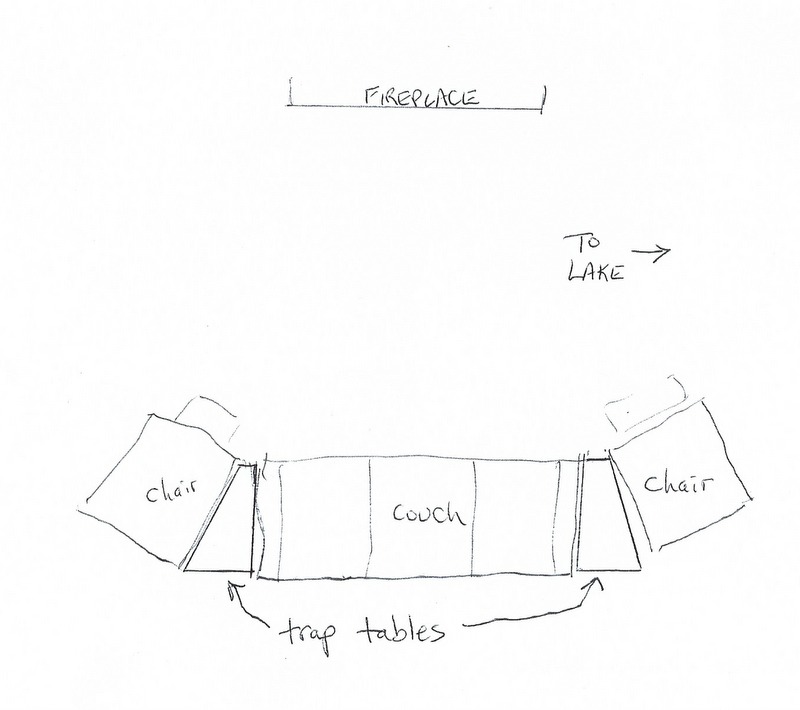
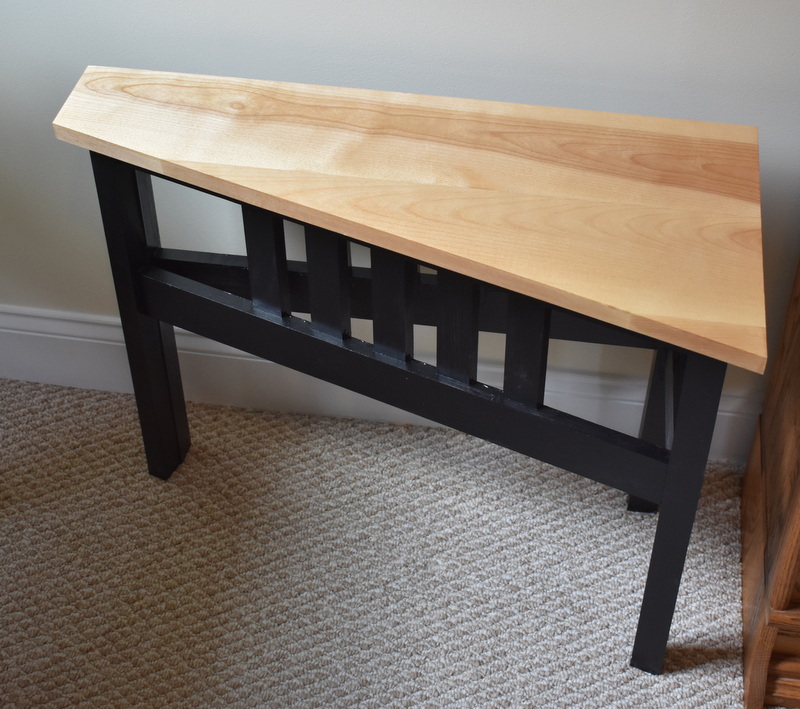
But visualize the following arrangement: There's a fireplace with a TV mounted over it, and seating consisting of a couch and two recliners that are arranged to view the TV. The recliners are angled slightly so four or five people can watch at the same time (probably basketball here in North Carolina). So, this creates triangular spaces between the seating furniture, and a rectangular table does not really work. But you still need a place to put your drink every now and then. So I thought triangular, but decided that I did not like the sharp pointy end. I came up with the following:
So, how to make these? Go buy a seven foot long by six inch wide piece of birch (like the other tables). Cross-cut it into three pieces. Clean up the edges and edge-glue them together to form a 28 x 18 rectangle. Now, draw a diagonal such that the grain looks best and the top fits the available space between the chairs. This design requires four legs (2 x 2) with the ones on the pointy end glued together to create one wide leg. So even the small end needs to be big enough for that, and also big enough to hold, say, a coaster for drinks. What I came up with was 4.5 width on the narrow end, and 13.5 on the wide end. I drew a line across the surface to give me those dimensions.
But wait! Think about what you really want to see before you arrange and glue up the boards. If you look at the picture above, you can see that there is no way those two trapezoids fit together to make a rectangle. That's because you have to flip one over after you cut it. Happily, I was awake enough to think this one through up front. There are bad spots on any board, and you want those on the bottom. And you want the natural pattern of the wood to end up with the best sides on top. The boards were arranged and glued up with that in mind.
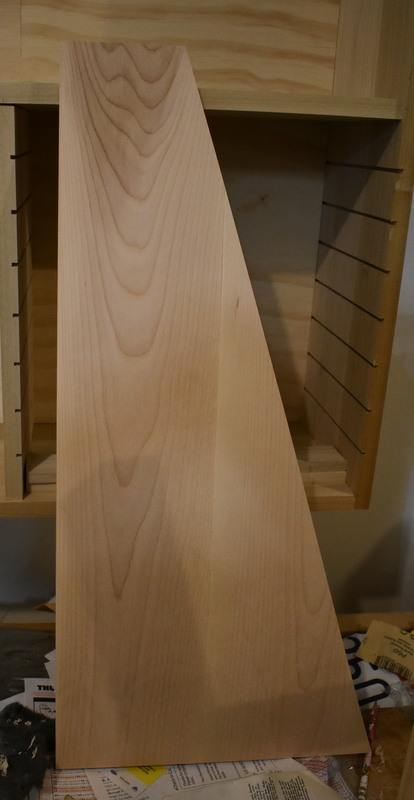
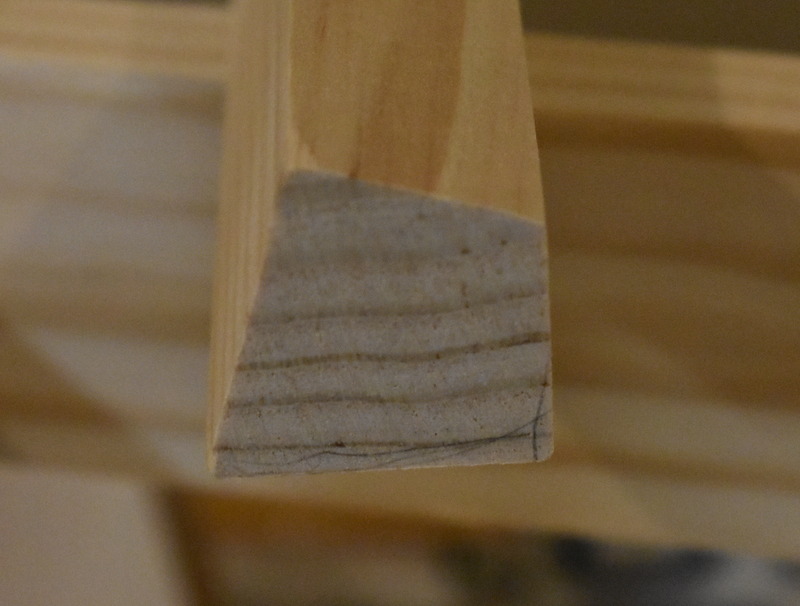
Next, I had to cut it to form the angled side. I did not want to use the tablesaw since it is exteremly dangerous to use one freehand and my current saw would not allow for a jig. So I just used a ryoba and cut it by hand. I then grabbed my narrowest bench plane (Miller's Falls #8) and planed off all the imperfections on the sawn diagonal. This just worked far better than I could have done it with power tools, and was faster as well. The dark areas near the bottom in this picture are just shadows of the leg assembly nearby.
So now I had table tops, and I set to work on the supporting structure. This is just made from higher-quality S/P/F that gets painted black. I figured out the right height and cut a 2x2 into four equal lengths for the legs. Everyone agreed that 22 inches worked pretty well in relation to the seating, so the legs are 21 inches to allow for 3/4 inch of top and something on the bottom to protect the wood floors. I then arranged them on the bottom surface of the first table top (legs about one inch in from the edges) and measured everything. Then I cut the rails. The top rail is just a 1x2 that gets screwed into the bottom surface of the table top. The lower rail is a 1x3 that is parallel to the top rail with a six-inch gap between them. The rails are attached to the legs with mortise and tenon joints. Easy, right? Well...
For this table, two of the legs are beveled lengthwise. How much? You take a bevel gauge and measure the larger angle you ended up with on the table tops - here, 72 degrees. The legs then have to be beveled the complementary angle, or 18 degrees (72 + 18 = 90). Now the side of the leg that faces the angled side of the table will be parallel to it, as will its rails. So there's just one little problem left. We all know how to make a 90 degree M&T joint right? How about a 72 degree M&T joint? Hmm. Oh, I guess I forgot to mention that the face of the leg that gets the joint is a 90 degree one, not a 72 degree one. The mortise is not so bad - just make it go in at an angle. The tenon? Well, the part of it that mates with the leg has to be at that weird angle. Whose idea was this again? Time to stop and rethink the process.
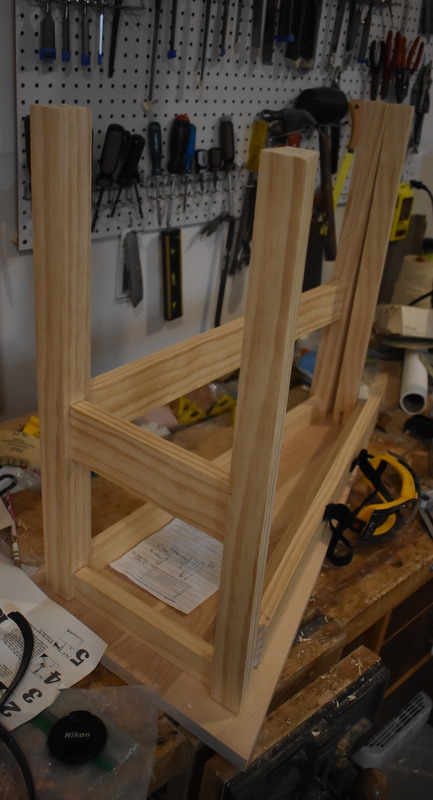
The solution turns out to be to make a second side of the angled legs be at 72 degrees also. This results in all the M&T joints being sane 90 degree ones. What you end up with is two of the legs having two 90 degree corners, one acute corner, and one obtuse corner. Just remember geometry class, and maybe trig. OK, a picture will help:
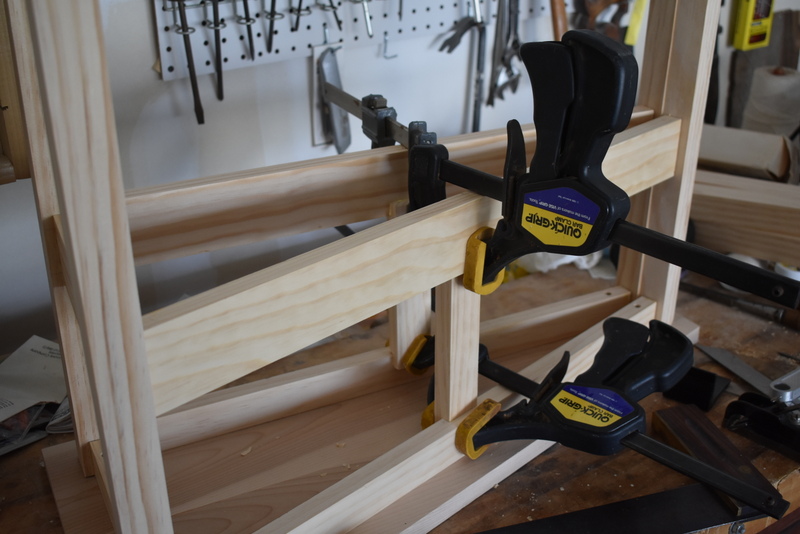
Here is the layout of the legs and their rails. I have not cut the mortises for the big rail on the two weird legs in this picture, but you can see one for the smaller rail adjacent to the table top. The hypotenuse side is not installed yet, of course.
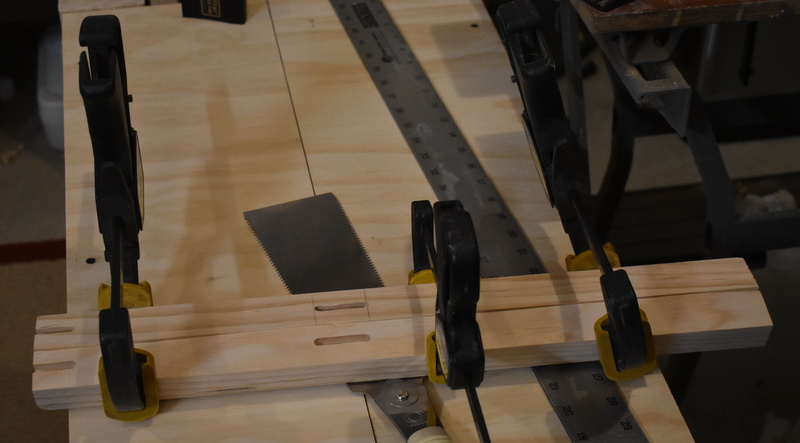
So all that's really left (structurally) is to finish up the M&T joints on the hypotenuse rails and drill the mounting holes. There's a minor issue with the latter in that you want the screw heads to be recessed. Here I use 1 1/2 inch screws, the same length as the top rail width. I just made a larger diameter hole about 1/2 inch deep and a smaller one below it all the way through. That way I get a good half inch of grip in the table top. Once that's done, it is just a matter of gluing the leg assembly together. You may note in the top picture that the coffee table has five decorative vertical pieces. It seems like a good idea to replicate that here on the long sides, even if no one will ever see them next to other furniture. Unfortunately, the one visible side is too narrow for rails - only about eight inches between the legs.
The next step is to glue everything together: We start with the two legs that are glued together to form one wide leg at the pointy end:
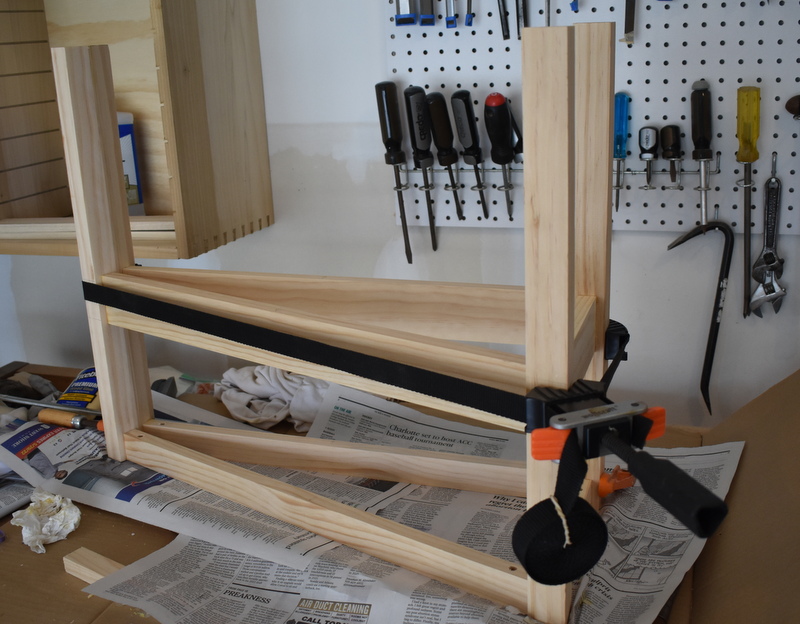
We then dry-assemble the structure, check for fit, and glue up the joints. A band clamp really helps here, even if it was designed for four corners and not three.
Now we attach the ten trim pieces, They are just notched and glued in from the back. There is another piece of furniture from this family with more complex joinery for trim, but it is not in the same room as these. So we will just make sure all four family room tables are the same.
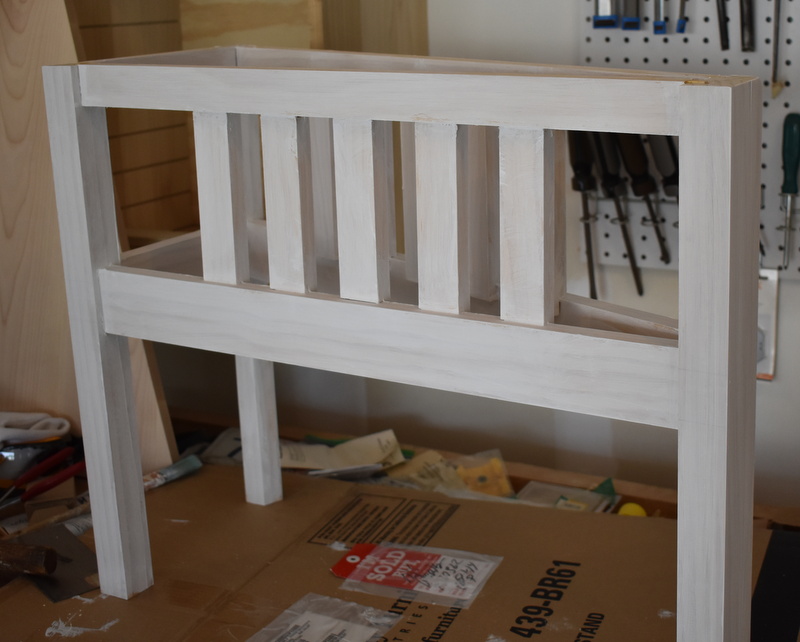
When everything is put together, we prime the support structure and get ready to paint it. Getting a paint brush into the narrow end of the wedge was amusingly difficult. For the next one, I am thinking of priming everything before assembly.
And - done with one.
Then I got to do it again for the other table.
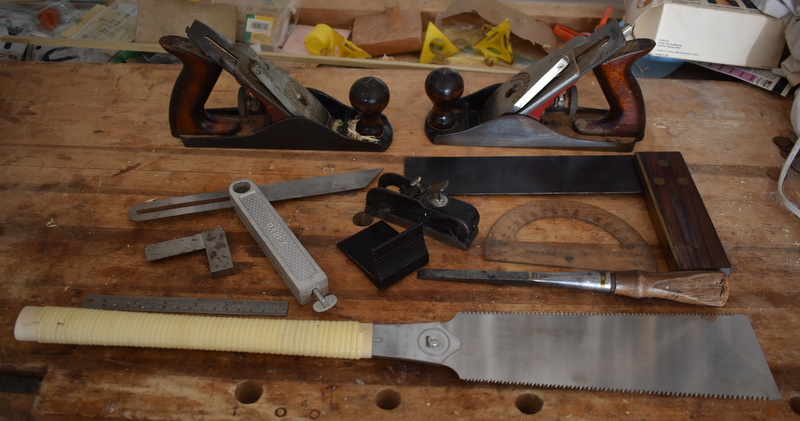
This being a tool-oriented group, I felt a need to show some of what got used for this project: Lots of marking and measuring, as you would expect from the nature of the design.