Wood: maple, walnut, veneer
Finish: Lemon shellac
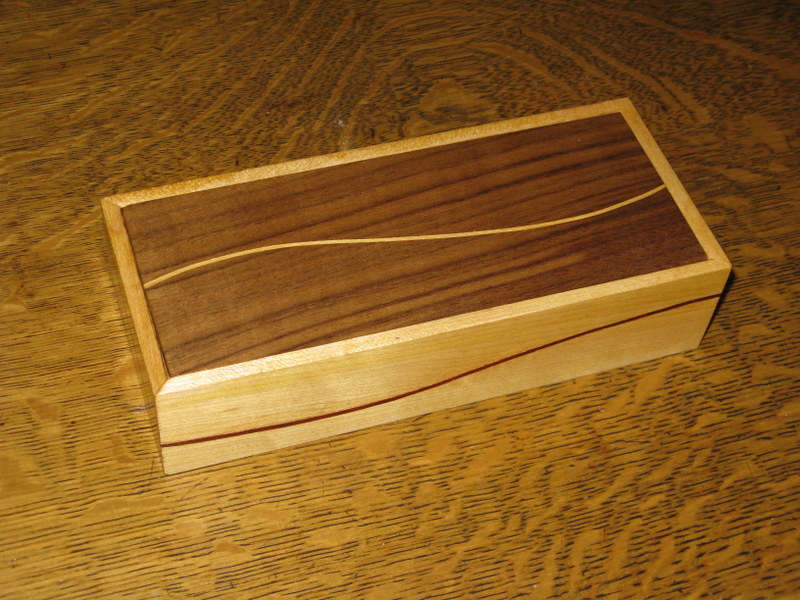
This box was a gift for my oldest granddaughter's seventh birthday, based on a design from John Bennett's book Making Little Boxes from Wood. It is dimensioned to hold standard-sized pencils, but it's really just a small rectangular box with a lid that opens by pressing down on either end. The underside of the ends is beveled so that when you push down on one end, the other end pops up.
Of course, the really interesting part of the design is the curved inlay on the top and sides. This done by laying out the design using a French curve. The top is easy, but you want to lay out the whole series of curves on the sides before cutting the side material apart. That way, things line up at the corners. I did not attempt to make this one long sinusoidal curve, although I could have done that. Instead, I just marked the board to define the lengths of the four sides, then did the layout so everything connected at the corners. The advantage of this approach is that each side is visually interesting. Probably, this is more important on the ends. You have to fit a "sine wave" into about three inches.
Once the layout is done and a rabbet and groove have been plowed for the top and bottom, you can go ahead and cut out the four pieces. I made the box body first, then made the top to fit later. The next step is to saw along the curve using whatever method you choose. You then clean it up as necessary (spokeshave and sanding) to make it reasonably smooth - it does not have to be perfect. Make sure you mark all the pieces before you cut them apart, as they will look pretty similar. Next, choose a contrasting veneer for the insert. I really wanted to use some sawn veneer that Roger Van Maren and I had cut a number of years ago, but it was too thick to flex enough on the ends. So I just hit up the bottomless veneer pile for something appropriate. Grabbing my veneer saw (finally get to use it), I cut out three strips for each side, just a bit wider than the thickness of the material (which is about 5/16). It's fairly important to give it some extra length, as the curve will consume more than you think. I then glued the three strips together to get a proper thickness for the "line" and glued the top and bottom of each side together with the three strips in between. This was absolutely the hardest part of the project. Clamping something together like this and keeping everything coplanar was a bit of a challenge.
Once the panels are dry, you can starting planing, shaving, and sanding them down to get rid of the edges of the veneer strips that are sticking out on both sides. The box has mitered corners, and since it is quite short, there was no issue with doing the work on the miter trimmer. When everything is the proper length, you just glue up the sides with an appropriate bottom (very thin plywood) and let it dry as an assembly.
The top is built pretty much the same way as one of the long sides, just using a reverse-contrast. Once it has been test fitted, you can go ahead and bevel the ends back on the bottom side.
The box was finished with a bunch of coats of lemon shellac, then the finish was leveled and polished out with pumice and rottenstone. A coat of paste wax brings back the gloss. The finish made the top a little tight, so I had to do a little trimming on the width of the top afterwards. You can't really see it, and walnut planes really well anyway. I did not finish the inside, but there is a felt liner for the bottom.
![]()
![]()