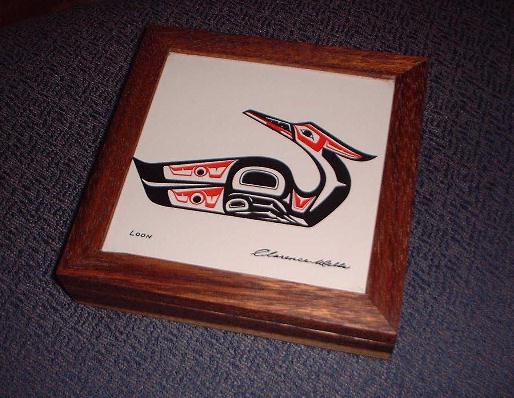
Tile top is a Haida representation of a loon, thus the name.
This is the second box project, designed to overcome the primary discrepancy of the first project, above: completely skipping over the step that was the motivation for building it in the first place.
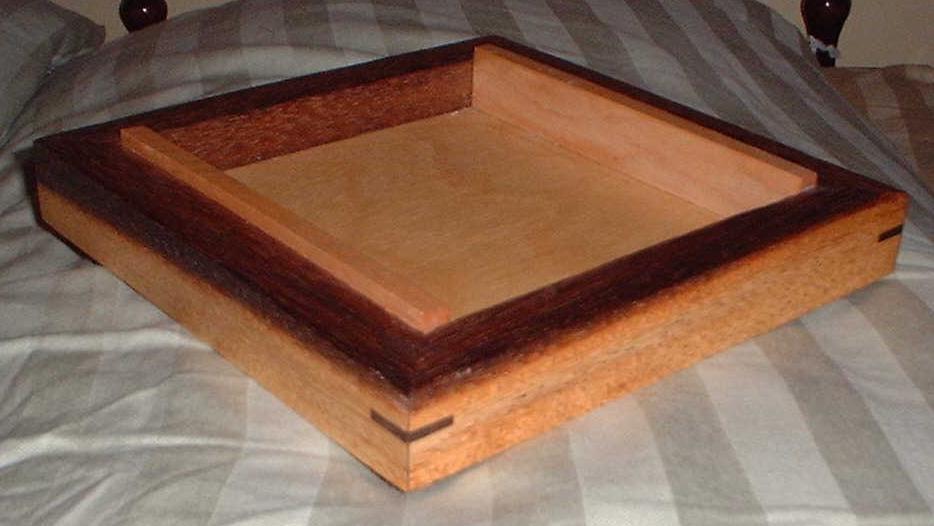
In the first picture, you see the box closed; in the second, you see the base with the top removed and photographed from the back side. This box was made from a piece of Jamaican Raintree with a diagonal stripe separating sapwood from heartwood. (Fans of Jamaican beer would probably call this the Red Stripe Phenomenon.) The box was made so that the stripe starts out with minimal light wood at the left rear corner, increasing as it travels toward and across the front, towards the back on the right, and across the back. At the left rear corner where it is not too visible, the mostly light wood meets the mostly dark wood, but the front of the box shows a more or less even split between light and dark.
Wood: Jamaican Raintree, walnut (keys), curly maple (inserts)
Finish: Galootian Formula 16, this one based on 1/3 linseed oil, 1/3 spar varnish, 1/3 turpentine. Apply three coats, let dry for two weeks, wet sand with mineral oil and 600 grit wet/dry paper, repeat with 1000 grit paper, rub out with mineral oil and rottenstone. Wax lightly. I wanted to try an oil-based finish on this wood since it is really absorbent. It is really pretty, but in my heart I'm a shellac man these days.
Oldtools used: saws and planes, mainly. Miter box and miter trimmer for the joints. Ryoba for cutting the box open.
Lessons learned: Well, I remembered the keys this time. The first box, above, just has the tile as the top, dropped into a rabbet on the box. This is the first attempt at making a box with a real top. The box is built with the tile top inserted in a groove in exactly the same way as the plywood bottom. Once the box is glued up, you cut it in half to create the top and bottom. This was a relatively small piece of wood left over from a picture framing project. Thus, the box is really short and I had to be careful in locating where I wanted the split. I used the ryoba because it has a really thin blade and I wanted to waste as little material as possible.. I first used a marking gauge to scribe a line where I wanted the box to be cut, then followed it as closely as I cut with the ryoba and a batten. Once the box was split, I made two inserts from curly maple (my standard scrap wood these days) to provide location for the top. I was kind of making this up as I went along. This is the third thing I have built from this wood, and I don't really like working with it that much - too soft and "crumbly." Luckily, it's gone now.
Remarks: Box two is for me, and achieved the goal of figuring out how to make keyed miter joints. I can now move on to the third and final box of this series with a bit more confidence. As noted above, it's story is here.
Once the first series was complete, other box projects have come up from time to time. There are a few boxes made for and with Sonoma artist Jackie Avery, an occasional box made just because an interesting piece of wood turned up, and a new series of tea chests. These are larger boxes than I have made in the past, and require somewhat different techniques.
![]()
![]()