
Wood: Philippine mahogany, walnut, poplar (drawers), thin plywood.
Finish: boiled linseed oil single coat, built up finish of orange shellac (from Ron Hock), paste wax
Hardware: The brass drawer knobs are by Brusso
I had an assignment to make a jewelry chest for my daughter-in-law's graduation from law school in May of 2004. Naturally, I had to practice for this, as I had never made a jewelry chest before. I decided to prototype it in something inexpensive and easy to work, so I chose Philippine mahogany. The idea was to make this one for my wife, figure out what I liked and disliked in the design, and then apply that to the one I was making for Erica. It took a bit longer than expected, as the prototype got done in time for my wife's birthday in July 2005. Thus, the real one has been somewhat delayed, although it was being worked on as the finish cured on this chest.
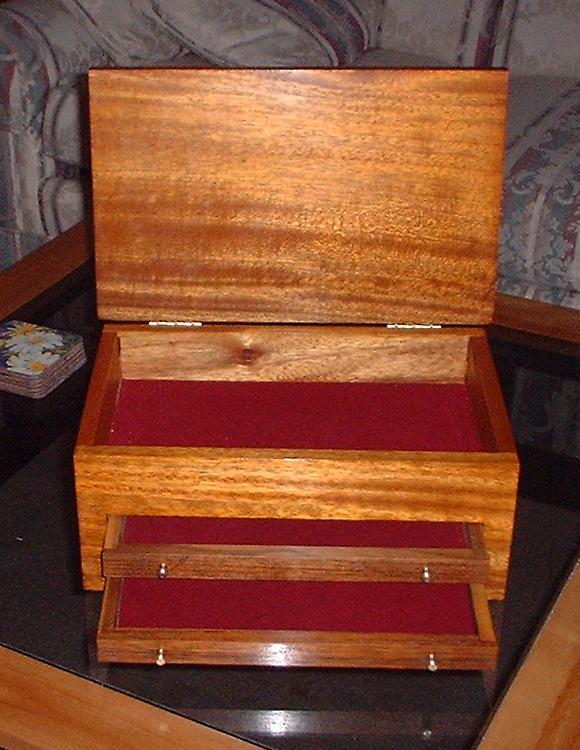
The basic design of this chest is a golden rectangle, not counting the top. It's about 16 inches wide, so you can work out the rest. The two drawers are about an inch high at the front, and are intended for small things like rings and earrings. There is a top compartment to hold larger items. This could be subdivided, but I have not yet made any dividers until it is determined if they are needed, and what a suitable grid might be.
The basic carcase is a rectangular box held together by hand-cut half-blind dovetails. All four sides have been cut out to leave feet at the corners. Mostly, this was done with a coping saw and cleaned up with spokeshaves. Two cutouts were made in the front for the drawers using a similar approach. It was quite difficult to get the two cutouts parallel to the top (and to a lesser degree, the bottom) and to each other, as well as being exactly the same size. There are two interior platforms made from very thin plywood - one at the bottom to keep anything dropped from falling through (although it isn't clear why this is really necessary), and one that constitutes the bottom of the top compartment. These are set in grooves plowed on all four sides. There are two rectangular poplar blocks glued to the inside of each of the two sides; the drawers ride on these.
The walnut drawer fronts were then cut out to fit the final size of the openings. The drawers themselves consist of poplar backs and sides and a thin plywood bottom that rides in a shallow groove plowed in all four sides. The plywood drawer bottom is covered by maroon felt, as is the bottom of the top compartment. The drawers are exactly deep enough so that the drawer fronts are flush with the front of the carcase when closed. It isn't clear whether I actually planned it that way, or just got lucky. The outside of each drawer sides has a groove plowed in it. This groove engages with a wooden block that is glued to the inside of the carcase sides. The drawers move quite smoothly despite the roughness of the groove. I will be more careful to make it look nice on the next one. There is no stop to prevent the drawer from being pulled all the way out, but I am uncertain if one is really needed.
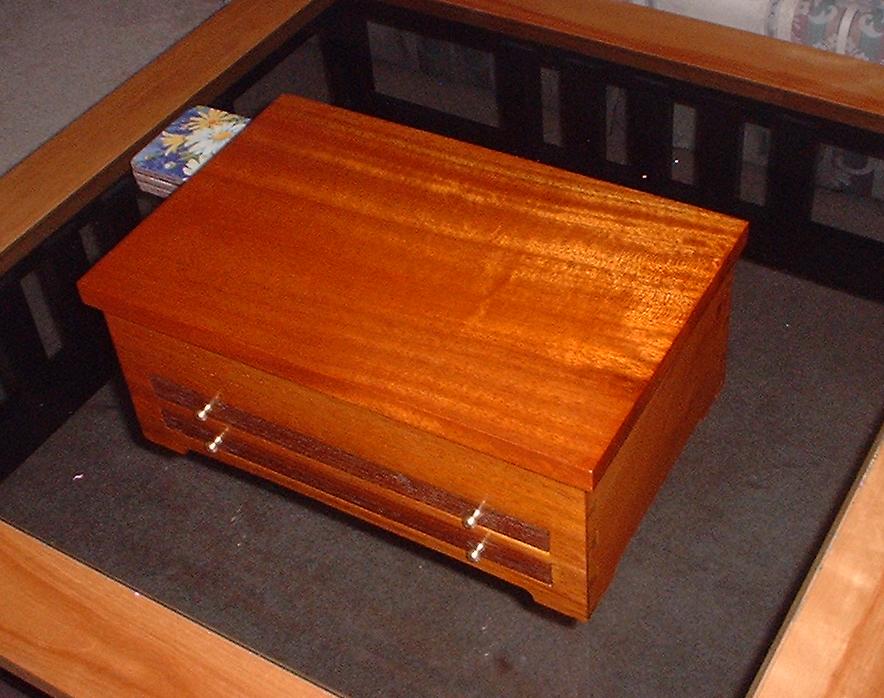
The top is flush against the back but overlaps the front and sides. Thus, no handle is needed. The hinges are brass stop hinges of unknown brand, and are mounted to the exterior surface of the top and back. This is a departure for me, as I normally use interior hinges on small boxes. I had purchased them with the idea of finding something to do with them some day, and they were the largest hinges I had in the shop. Thus, they got used on the largest box I have made to date.
I was happy to have successfully completed the half-blind dovetails, although they required a great deal of patching to compensate for mistakes I made in cutting them. I was happy to have completed the two parallel drawers without too much repair work needed. Neither of these things will apply to the next chest, which will have through dovetails and a single drawer. Because the drawer will be deeper, I will go ahead and make some dividers for it. With one drawer, the top compartment will be larger, and I may provide a sliding tray in it about half way down. A different type of hinge will be used, and probably will be hidden instead of exposed. The top may be flush on all four sides. As construction progresses, these details will be finalized.
![]()
![]()