Here, I will show you some of the projects my son Dan and I have worked on over the last few years. I don't have photos for everything. For now, you'll just have to use your imagination on some of the projects. In the interest of speeding up downloads somewhat, I am in the process of splitting off some items from this page (the main projects page) to a secondary page for projects other than furniture. Early furniture remain here. These are projects that were completed in my shop in Los Gatos from 1993-2003. In 2003, we moved to Santa Rosa, CA and Dan started his own career at IBM in Burlington, VT and later Raleigh, NC. Some projects that were completed in the new shop appear on other pages, notably the various projects involving small boxes. But this is not to say that no more furniture work occurred. A new house requires new furniture, and I have decided it also requires a new web page. I am attempting to better document projects as I go along, and some of these newer furniture projects are more along the lines of photo essays. These have their own pages which will be referenced; some are on other sites than this one. If you wish to jump to the newer projects, you may do so either here or at the bottom of the page.
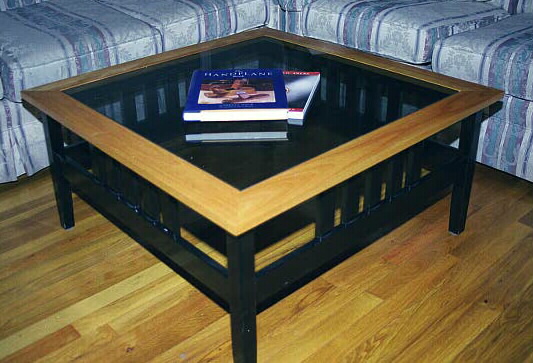
Wood: Birch top, Douglas fir base
Finish: Tung oil varnish top, black enamel paint base
Old tools used: Not many, but the tapered legs were done with a shooting board.
Lessons learned: You can make perfect miters if you spend a week getting them that way. Find a good glass vendor - this one didn't get it right in two tries, and I no longer do business with him.
Remarks: Kind of a quick and dirty design from our power tool days, but we still get more "You made that?" comments on this piece than any other. The mortise and tenon joints on the legs were a good introduction to this technique that has served us well in other projects.
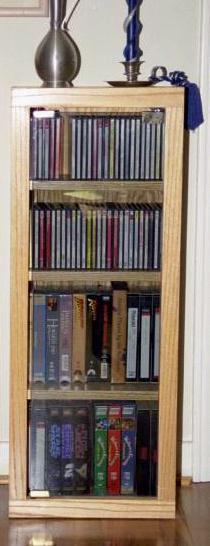
Wood: Red Oak
Finish: tung oil varnish
Old tools used: various hand planes
Lessons learned: The rails and styles would have looked better if organized differently. The face frame is too big, and makes it hard to get to the CDs or tapes on the end without taking one out from the middle. Mediocre design, OK implementation. Also, I have far more CDs and videotapes than I thought.
Remarks: This is an example of building a cabinet around a glass door that used to be part of something else. I still have one door left so I will build another one of these, but it will be sufficiently different that I'll put it in some other part of the room.
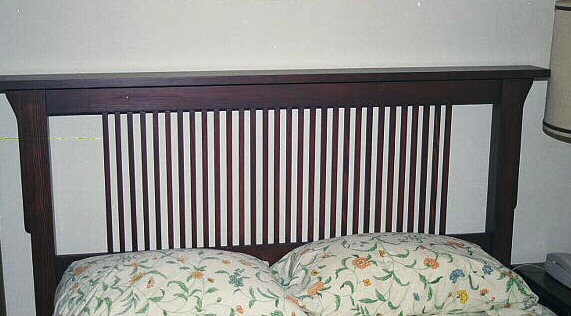
Wood: Douglas Fir
Finish: Red Mahogany stain, water-based poly (?)
Old tools used: various hand planes
Lessons learned: We chose fir because we wanted it to be somewhat light in weight. It is a nasty, splintery wood for the thirty-odd "sticks"; next time I would choose oak as in most of the original Mission furniture despite the weight. I was always worried that Dan would wake up in the morning with splinters in his hands (this is his bed).
Remarks: Buying one of these will run you about $1000 in our area, so this may be one of those projects where we actually saved money, assuming time doesn't count for much. Another project from the power-tool days, but the design phase was the most interesting part.
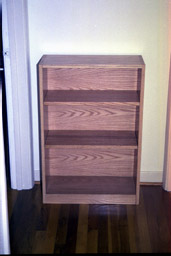
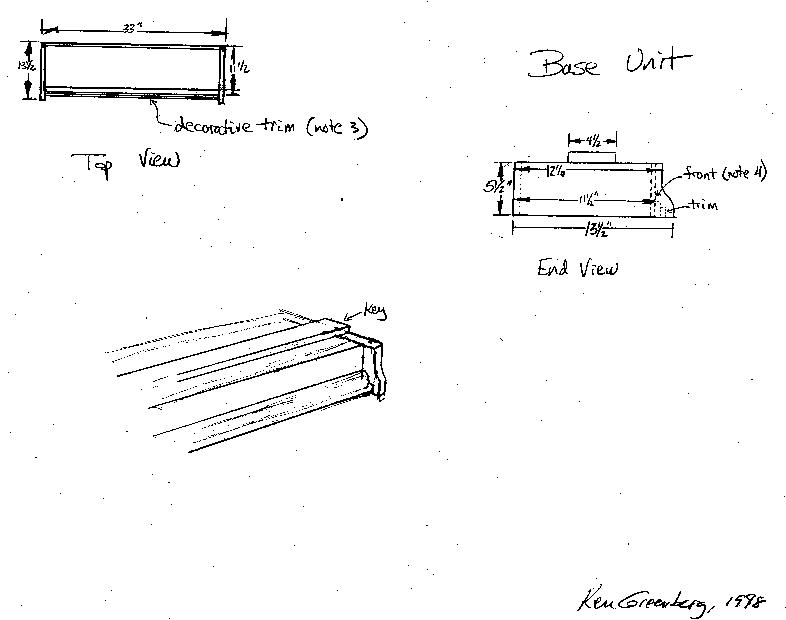
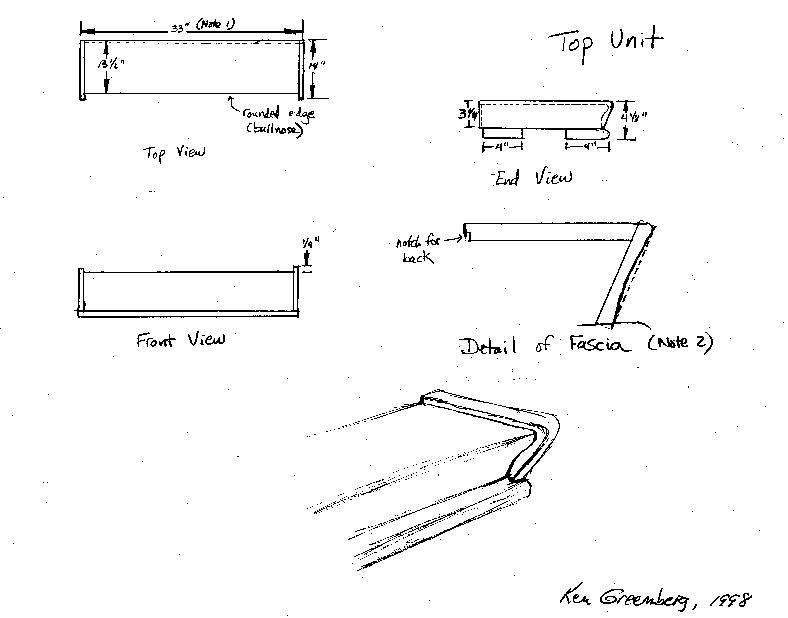
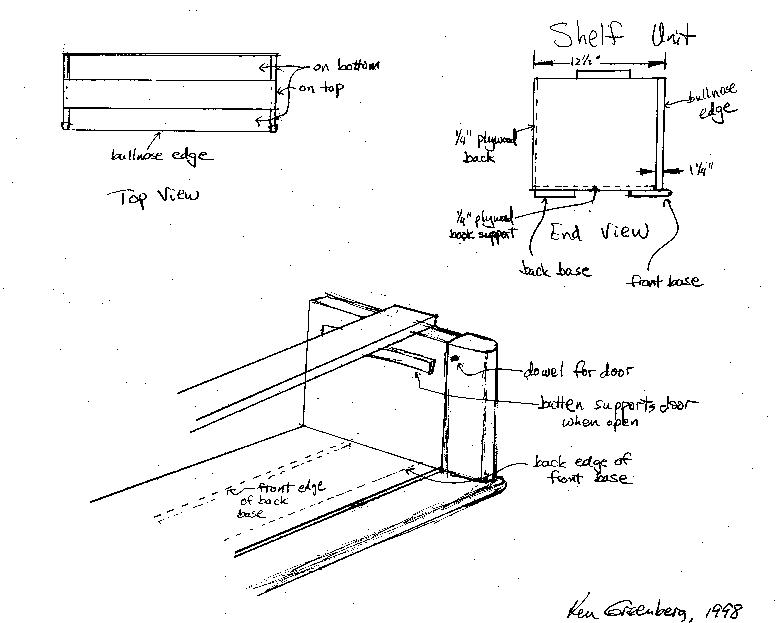
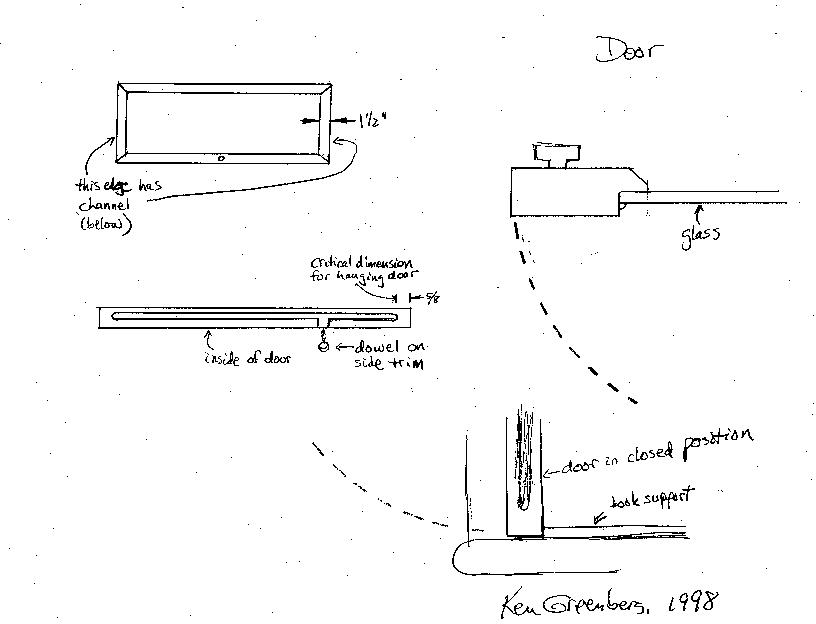
A barrister's bookcase consists of a base, top, and one or more bookcase units. The bookcase units are independent, and have tilting glass doors on the front. Originally, this design was supposed to allow barristers (lawyers qualified to practice before the bar in England) to take their books from office to office, or even to the courtroom. This design is a late 19th century American version, not nearly as transportable, and with a very simple mechanism for the doors. It does not, in all honesty, work as well as a mechanically enhanced version, but it is very inexpensive to build. The prototype on which this design is based belongs to my mother in law, Helen Gillespie. The original bookcase (despite there being no attachments between shelves) survived the 1989 Loma Prieta earthquake with no damage. The house in which it was located fell off the foundation. I think this says something about the overall quality of the original design (of the bookcase, at least).
The original had five or six sections. Mine presently has four.
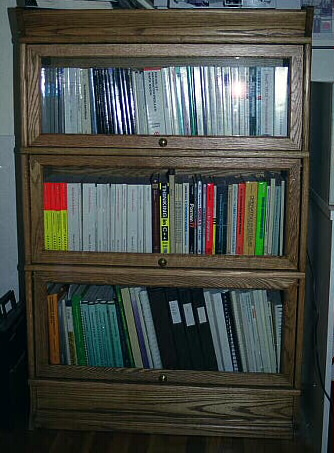
Wood: red oak
Finish: Galootian formula 16 (1/3 tung oil, 1/3 spar varnish, 1/3 turpentine) mixed about 50/50 with dark solvent-based stain
Old tools used: Innumerable planes, including molding planes for the bullnose edges, spokeshave, Disston D-8 crosscut saw, brace, #271 small router plane, lots of chisels, IT saw, scrapers, and probably another half dozen tools I can't think of.
Lessons learned: The fascia strip on the top unit was mostly done with a gooseneck scraper since I had no molding planes back then. My right thumb has not worked right since. Oh, well, I got a good 48 years out of it. Once you get the top and base done, you can add a shelf in a relatively short time.
There are actually some drawings for this project on this site. Feel free to download them. There are separate ones for the base, top, shelf, and door units. You will also need the construction notes.
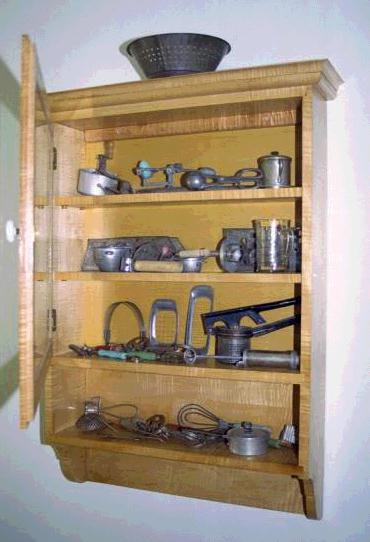
Wood: soft curly maple from Maple Leaf Hardwoods
Finish: About six coats of orange shellac from Patrick Olguin
Old tools used: Darn near all of them.
Lessons learned: If you promise your wife something, you better finish it someday.
My wife collects old kitchen tools, and when we got married, I promised a place for here to store them. This wall mounted cabinet is about 40" tall and about two feet wide. It is very loosely based on a much smaller cabinet from an old Woodsmith magazine, but the design was considerably changed along the way. It does retain the basic construction approach, including the 3/8 inch inset door - except theirs was a solid wood panel instead of glass.
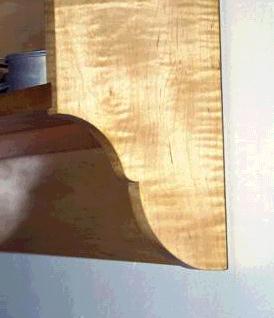
The curve on the bottom was all done by hand, as was about everything else except rough dimensioning of the lumber. Once I figured out what it was supposed to look like and my wife approved the design, the shape was roughly cut out with a coping saw and finished with a couple of spokeshaves. The shop-made one from John Gunterman's class was the most useful.
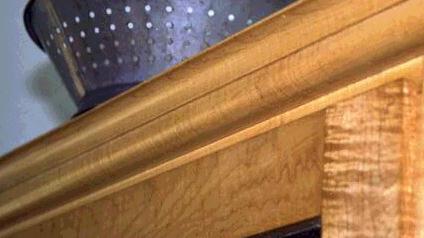
The reason I need 40 molding planes is so I can do things like this. All work was done with hollows and rounds, since that's what I have so far.
As part of the kitchen remodel, we lost the storage we were using for cookbooks. I recently replaced this with a small bookcase based on a design used in a course taught by Jeff Gorman. During construction, I photographed the dovetails as they were cut but not yet cleaned up (with my Independence Tools dovetail saw on top, of course).
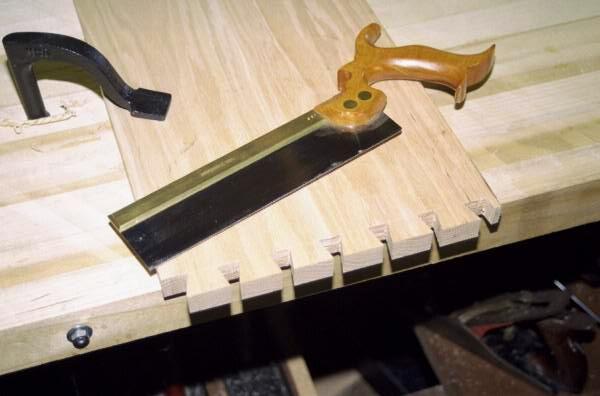
The finished bookcase looks like this. It seems quite plain, but the joinery is incredibly interesting (although you can't see it in this photo) and it is a very strong bookcase that could be used as a ladder if necessary. About two feet wide by three feet tall. The original has a cutout in the "base panel" but my wife did not want one for this bookcase.
To continue to the page describing newer furniture projects (2003 and later), click here.