
Most of the projects described on this site can be loosely described as furniture. But there are other things a woodworker makes that do not easily fall into this category. For example, storage for the shop is always in demand (and the supply is never sufficient so long as new tools arrive with some regularity). Items used in the shop itself - such as a bench - really belong in some other category. Moldings for a room, small boxes for storage, other "gift items" - the possibilities are many. In order to reduce the time it takes to load a page, I have split off my single projects page into the main page and this one. The main projects page still describes furniture, and others have links to it. Thus, it is useful to retain its URL. Non-furniture projects now have a home here.
There are some projects that are not on this page due to complexity.
Click on any thumbnail picture to see a larger version.
To jump to the furniture page, click on this hyperlink or just use the "back" button on your browser - depending on how you got here.
This is a borderline case - is a step stool a piece of furniture or not? In my case, it moves around more than any piece of furniture would, since my wife uses it to reach various cabinets on an "as needed" basis. I tend to think of it more as a very short ladder, and one would not normally consider a ladder to be a piece of furniture. (Library ladders may be another borderline case.)
Wood: Clear pine, redwood
Finish: Shellac (lemon, if I recall correctly)
Oldtools used: Various saws, planes, coping saw, spokeshave, eggbeater drill. Nail, string, and pencil (used to layout the arches in the sides, which were then cut out with the coping saw and cleaned up with the spokeshave).
Lessons learned: This was my first attempt at using shellac, and redwood was an amazingly bad choice for practice. Basically, it's like shellacking a sponge. It took eight coats before I even noticed there was a finish in progress, and another four until I gave up, rationalizing that for something that someone would be stepping on, this was good enough.
Remarks: This is based on a measured drawing of a similar stool in a museum. The original is made of pine and painted. I do not care for this look, so I made it out of clear pine (mostly) with redwood steps. This provides some contrast and will remind me of California if I ever move away. Also, the original uses nails for assembly, and I preferred to use screws and to cut plugs to cover the screw holes. Ultimately a utilitarian piece, the original is believed to be more intended for shop use than household use. Mine stays in the house. I have certainly seen prettier and more interesting stools than this one, but it serves its purpose well and took no more than a day (other than waiting for glue and finish to dry) to construct. It is a rather clever design in that the back is slanted forward. This places the high step closer to the front of the stool than would be the case if the back edge were vertical. By doing so, the weight is more evenly distributed and the chances of tipping over are greatly reduced.
As every woodworker knows, it takes a bench to build a bench, making the first one somewhat difficult. In this photo, we see an example of recursive bench construction. The bench has progressed enough to use it for the work needed to finish it. Here, a Stanley #78 (once a resident of Ashby, MA) is used to create a rabbet on what will become the tool tray.
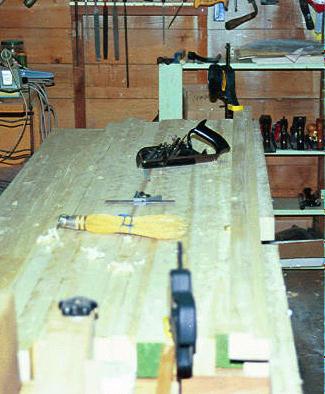
The bootstrap process for this bench was:
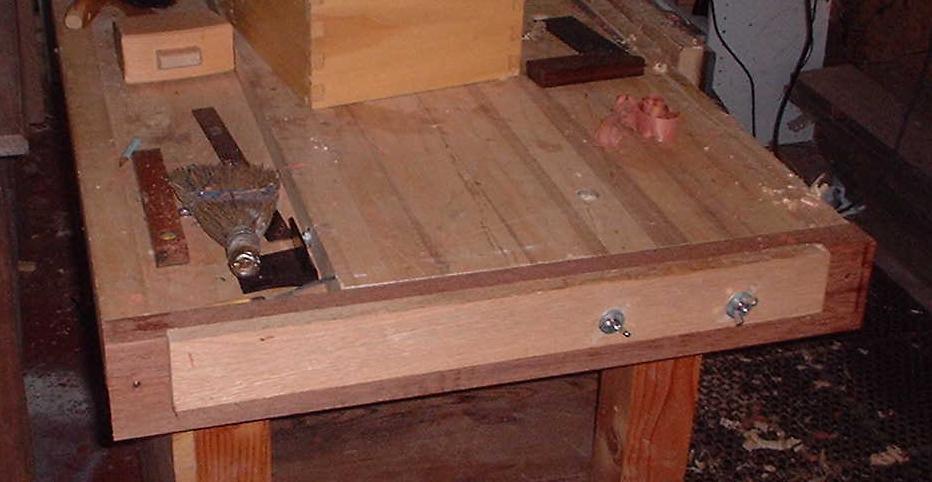
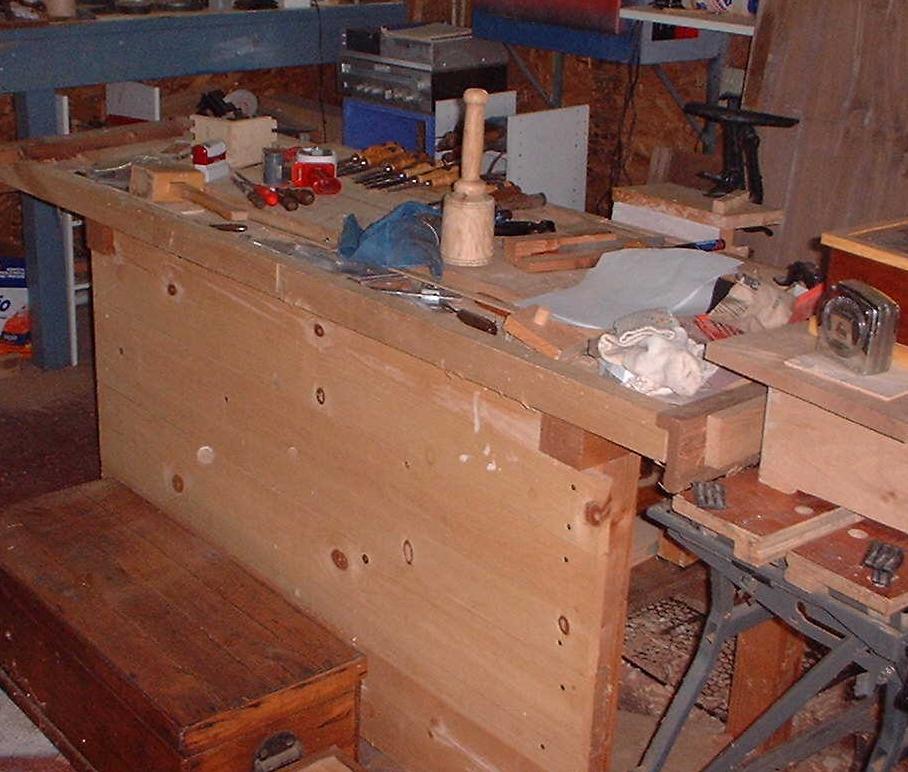
I recently (2001) added additional strengthening to the base to avoid racking (see picture 4, above), and added an adjustable stop based on Tom Holloway's design (we'll call it a hollostop) to one end of the bench. It is shown in picture 2 above, and is mounted on the end of the bench near the face vice. This allows something to plane against and should work well with thin or thick stock. Since I am working on boxes quite a bit these days, the ability to plane thin stock should be quite useful. Note the carefully chosen mismatched washers to give it that "homemade" look. This is the "Mark II" version in the picture since the bench now has mahogany end caps for a bit of contrast. I couldn't pass up an inexpensive mahogany 2 x 4.
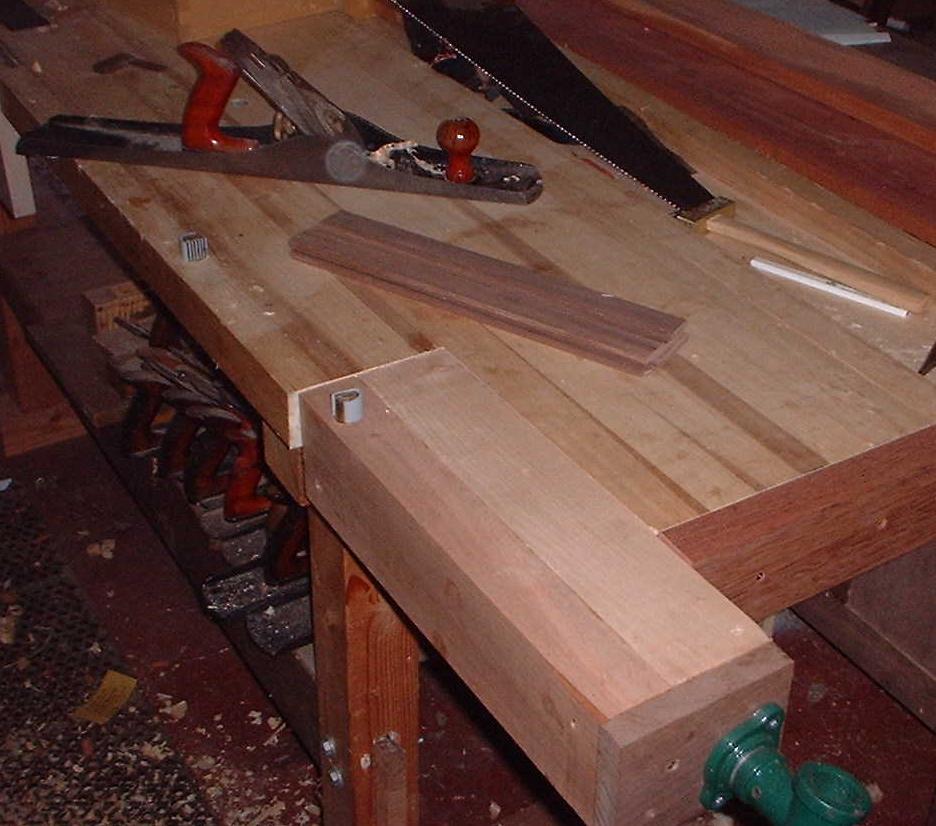
Also new for 2003 is the long-awaited tail vise. This was made from the Lee Valley-supplied hardware - the inexpensive Eastern European kind. Using the hardware on hand and the plans from The Workbench Book's Michael Fortune bench, I was able to build a decent tail vise. The core box (see the book) is made from oak scraps, the top is made from western soft maple that I had sitting around, the doghole strip is made from a piece of madrone firewood, and the decorative end cap from walnut scrap. Lots of different woods, a bit of "put it together and make it work," and I have something that seems functional if not perfect - thus matching the quality level of the bench pretty well.
The only bad part of the tail vise installation was that I discovered that the support leg on that end interfered with placement. As a result, I had to take the bench completely apart and rebuild the base to be seven inches shorter. This of course required making not only the stretchers shorter but also the back of the bench, since it attaches to the legs. A bit of long-term planning five years ago when I first put this together would have saved some work, but it only took about half a day to get everything back in order and to continue with the installation of the vise.
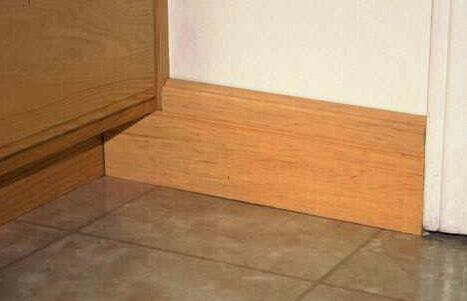
Owning 40 molding planes means you have no excuses when it comes to making moldings. (Well, there's always one more that you don't have yet...) We recently completed a remodel of our kitchen, and I saved part of the job for myself - making the base moldings for three rooms (kitchen, dining room, and entry/laundry/pantry area). This involved some serious design work, and some innovation in implementation. We ended up looking through some catalogs (generously photocopied by Don McConnell) and many moldings at lumber yards, but chose to invent our own. Dan and I did some prototypes and ran them by Mary until we got it right. We put a bead down about an inch and a half from the top (getting to use my new - well, 100 year old - Stanley 45) and designed an astragal and a cove at the top. That part is all done with hollows and rounds, after some prep work with a rabbet plane and a block plane to do the chamfering. At least 11 planes are used in making this molding. Then there was the problem of how to plane 13 foot boards on a six foot bench. (Answer: it helps to have another horizontal surface that can be adjusted to about the same height as the bench, and can move around as needed.

You can't make out all the planes in use on the bench, but the japanned ones in the background are the Stanley #45 combination plane (with beading cutter) and the #78 duplex rabbet plane. The shiny one is a #79 side rabbet plane, and there's a Millers Falls #56 on there somewhere. I am using one of the smaller molding planes, but three sizes of hollows and rounds (1/4, 3/8, and 1/2) were used to get to the finished profile. Then, there's an odd round that someone cut down to a point that is useful for starting the groove that the larger rounds must follow. All in all, a very galootish project.
Oh, you wanted to see the result? Here's a short section next to a doorway, the framing of which suddenly looks very bad in comparison.
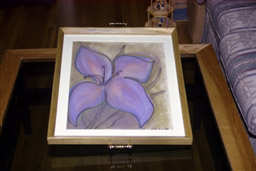
Art: Pastel sketch by Elizabeth Morton
Wood: Poplar
Finish: A solvent-based finish of dubious origin with no useful information whatsoever on the label. This was in the middle of one of my shellac periods, but shellac is not alcohol proof (since it is alcohol soluble). Since this tray is likely to see reasonable use for alcohol-based drinks, I wanted something different. OK, I was trying to use this stuff up.
Oldtools used: Miter box and miter trimmer for the joints. Stanley #78 duplex rabbet plane for the rabbets in which the picture is inserted. Small wooden Krenov-style polishing plane for cleanup. .
Lessons learned: Brass hardware can be expensive, especially if it is unusual. One of the interesting attributes of tray handles is that at least in this design, they need to be mounted from the outside. Most handles are designed for inside mounting. It took a while to find these, and they probably account for half the construction cost. Luckily Gail, my glass pusher, doesn't charge me much. I also was reminded that I am as bad at matting pictures as I always thought I was. I guess more practice is needed.
Remarks: This is based on a similar object in our family, probably Victorian and possibly of English origin. Essentially, this is a picture frame with handles on the ends. Mine has much nicer handles than the original. The frame has to be rather simple - narrow to keep the weight down, fairly tall to keep the contents in. You can't really see the profile in the photo, but the sides are at right angles and the insides are beveled at about 45 degrees. There is a flat on top, although the original came to a point. The green of the poplar was chosen to contrast the purple of the pastel sketch. This was a gift for my Mother. I'm thinking there could be a business opportunity making these things out of "refrigerator art" for people with small children. I have been acquiring old handles as I find them, so I plan to build a few more of these as time permits.
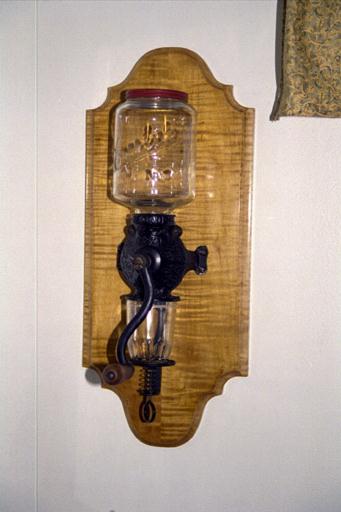
Wood: curly maple
Finish: Garnet Shellac, wax. Three coats of shellac, sanded to take care of the grain-raising effects, three more coats, let dry for a week, wet sand with mineral oil and 600 grit wet/dry paper, repeat with 1000 grit paper, rub out with mineral oil and rottenstone. Wax lightly. I really wanted to see how much darker garnet is than lemon or orange on the same wood used for the display cabinet. It's quite different. I guess the next maple project will go to the other extreme and use super blonde to preserve the lightness of the wood.
Oldtools used: Like most curve-intensive projects, I draw this out pretty carefully and then get close with a coping saw, closer with rasps, and finish with a spokeshave. I love rasps these days. Various planes and saws were used in stock preparation, molding planes made the cove in the sides. We won't talk about how the cove along the curves got made.
Lessons learned: I need to find an oldtools solution to shaping a curved edge where my molding planes won't work. I made some mistakes on the edge where the molding planes slipped (not having fences) but I was pretty much able to change the design to hide it well. Other than that, this came out pretty much the way I wanted it to.
Remarks: Several years ago while galooting in Montana, my wife spotted an old Arcade Crystal coffee grinder in an antique mall. It was overpriced and not in such great condition so we did not buy it, but she definitely expressed the idea that this was her birthday present. On return, we acquired a decent one for a fair price on eBay. I promised to make a mounting board for it, so we put it away in the closet for a while while we worked out the design details and it made it to the top of the project list. Eventually I got to it after a year or so, and since I had quite a bit of extra curly maple in stock (mostly due to ordering more when the design of the display cabinet changed), I figured that it would be a good choice. Besides, I'm better at shellac now, and I wanted to see what the maple would look like with a decent finish. The extra wood I had was not wide enough, so I ripped it to half the width and edge jointed it. This is not a hidden edge by any means due to the figure in the wood, but it looks quite nice. Mary designed the overall shape to frame the coffee grinder well. All I had to do was cut it out, smooth it, and add the edge treatment. All in all a relatively simple project, but fitting in well with her antique kitchen tools collection.
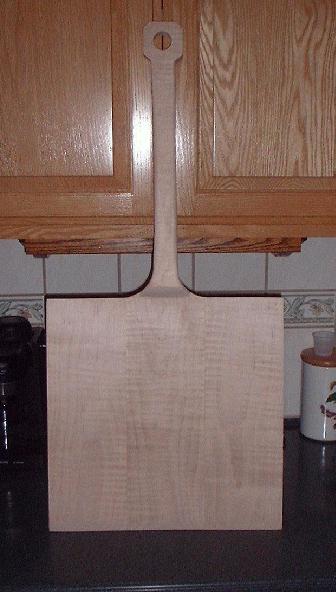
Wood: curly maple
Finish: None (probably sauce and cheese some day)
Oldtools used: crosscut saw, ripsaws, various planes, chisels, rasps, shaves, scrapers, brace and large (#20?) Russell Jennings bit.
Lessons learned: The hardest thing about this projects was flattening the area in front of the handle. Unfortunately, the grain ran the wrong way for planing, so I had to eat away the wood with chisels as best I could and then fix the damage with seemingly infinite amounts of scraper work. It would have been simpler to make the grain run in the opposite direction if I would have thought about it.
Remarks: Hey, you're a galoot, so of course you make everything yourself - including pizza. I make the crust from scratch, throw what I feel like on top, heat up the pizza stone in the oven, bake the pizza for about 15 minutes and it's done. The hard part is getting it out in one piece. But there's an easy solution to that - just make a pizza peel like they use in the restaurant, although it does not need to be as long because the oven at home is not as deep. Basically, this is two "sticks" about five or so inches wide using the standard utility wood around here, curly maple. Some day I will run out of it. One stick is pretty long, and includes the fairly-thick handle, tapering down to become the middle of the big square. The other piece is short and is ripped lengthwise to make the two outside pieces of the big square. What could be simpler? The square is sized to the existing pizza stone, about 16 inches in diameter. The handle is more than twice as thick as the flat surface so must be tapered down to make a nice-looking transition. The flat surface has to be pretty thin. As my son put it, "The purpose of a pizza peel is not to knock the pizza into the back of the oven" so it is not only thin but has a tapered leading edge to slip under the crust. I spent about a day playing with the handle to get the curves to where they were comfortable, but I left the handle end octagonal (done with a pretty big and very sharp chisel) because I liked the looks of it that way. I will probably tie a piece of rawhide or some such through the hole to hang it on the wall.