This page describes projects built in the Santa Rosa shop from 2003 to the present.
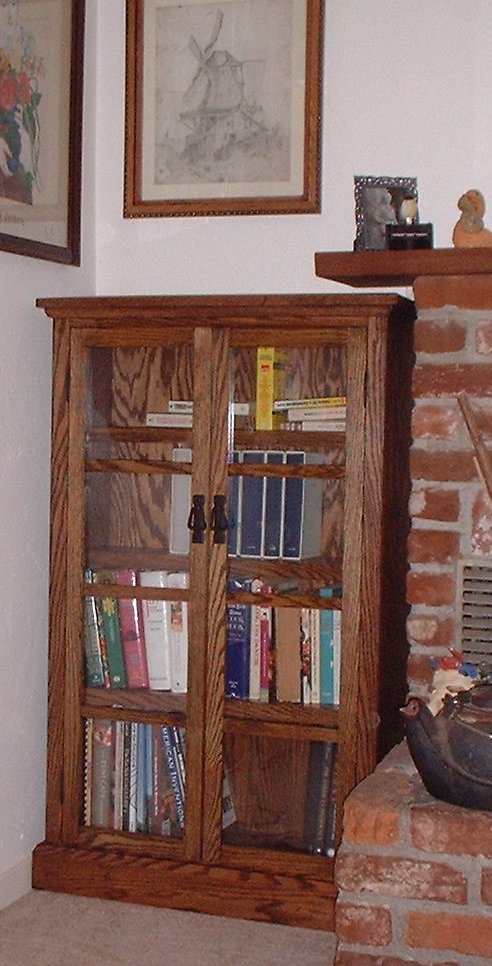
Wood: red oak and red oak plywood
Finish: A very complicated Mission oak finish by Jeff Jewitt, described here.
Old tools used: Various planes for the solid wood trim parts, but since this bookcase is primarily made from plywood there was a lot of machine work. Brace and auger bit for drilling the shelf holes, as always. Many chisels for rabbetting the mortises for the glass lights.
Lessons learned: It's almost as easy to build two of something as to build one.
Remarks: When we moved into this house, there were bookshelves around the fireplace but they were metal brackets inserted into metal strips screwed to the walls. These lasted about an hour, and came down as part of preparation for painting. About three years later, the project to replace them made it to the top of the list. The photo essay that describes how these were done is available here.
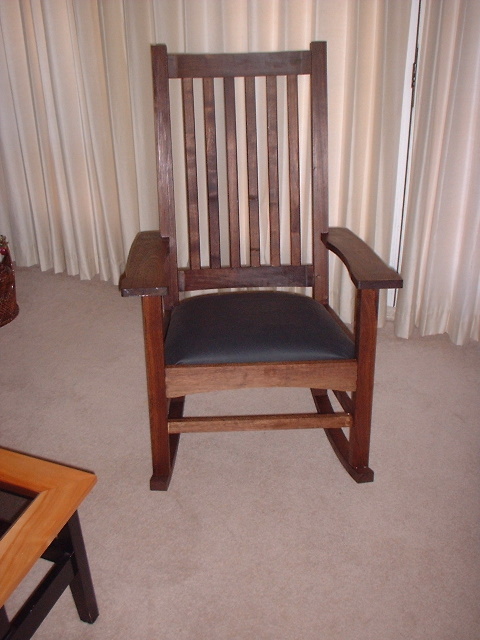
Wood: walnut, but probably some is claro and some is black
Finish: water-based poly
Old tools used: Darn near all of them. The Ohio Tools circular plane deserves special mention, though.
Lessons learned: A prototype is always a good idea. As we say in the software business, plan to throw one away - or just tell your wife you made it for her.
Remarks: This project started out when two different sources requested that a rocking chair would be a nice thing to have. My wife always wanted one, and my daughter-in-law wanted one to show up before she had a baby. The second goal was almost met, but at least I had almost nine months notice. The real issue was that I had to built it in such a way that it could be shipped from California to North Carolina as a kit and assembled there. It had to be done in time for my first post-birth visit minus about a week of shipping time, which was uncomfortably close to Christmas. Better make it two weeks shipping time. Since I knew when Erica's chair was going to be needed, I arranged things so that Mary's chair was built in parallel as a practice chair. That chair was a little bit ahead of the "real" chair until the very end, when time constraints forced me to just finish the last steps on the chair that had to be shipped. The practice one was completed on my return. But I had the opportunity to learn from the first one where my techniques had to be changed, or at least done a bit better.
The design itself is based on a pair of articles by Paul Sellers in Woodwork magazine a few years back (December 2004 and February 2005 issues). I mostly followed his plans, but it's too hard to built something without making my own modifications; creativity always gets in the way. One significant difference in this chair is that the front legs do not end in posts that project through the arms, as Paul's chair was designed. Due to some difficulty in understanding the drawings, the first chair had front legs that were too short to have the posts. I did try to make the second chair with them, but one of the arms split while I was making the mortise for the post. Since I was on a very tight schedule, I did an emergency redesign and made the second chair like the first. Also, my son did not like the back slats as show in the article, so I had to come up with an alternative form that we could live with. Other than that, the chair follows the original quite closely.
Chairs are complicated projects, especially a rocker. There are a lot of curved parts or oddly shaped ones. These required making a beam compass to create templates for all the large radii required (typically about four feet). Once the curves had been marked with the templates, it was time for rough cutting the blanks for rockers and back support rails, then cleaning them up with the circular plane and lots of scrapers. Still, once you get past these it is a matter of making large numbers of mortise and tenon joints. This chair has some very odd ones, since the seat is trapezoidal. Instead of 90 degree joints, the rails meet in the corners at 85 and 95 degrees to account for the difference in width between the front and the back of the seat. The M & T joints for the side rails all had to be made accordingly. Ah, well, we all like a challenge. Actually, the mortises are cut straight and the tenons are "bent."
This was also the first project involving upholstery, specifically 1/4 of a cow hide. Half a hide (enough for two chairs) is pretty expensive, and you don't even get the meat. But it was not that difficult, especially as my wife (who is a quilt maker and thus good at understanding material) did all the work other than clamping things together. I won't go into excruciating detail on the construction process, since it is well described in the original articles.
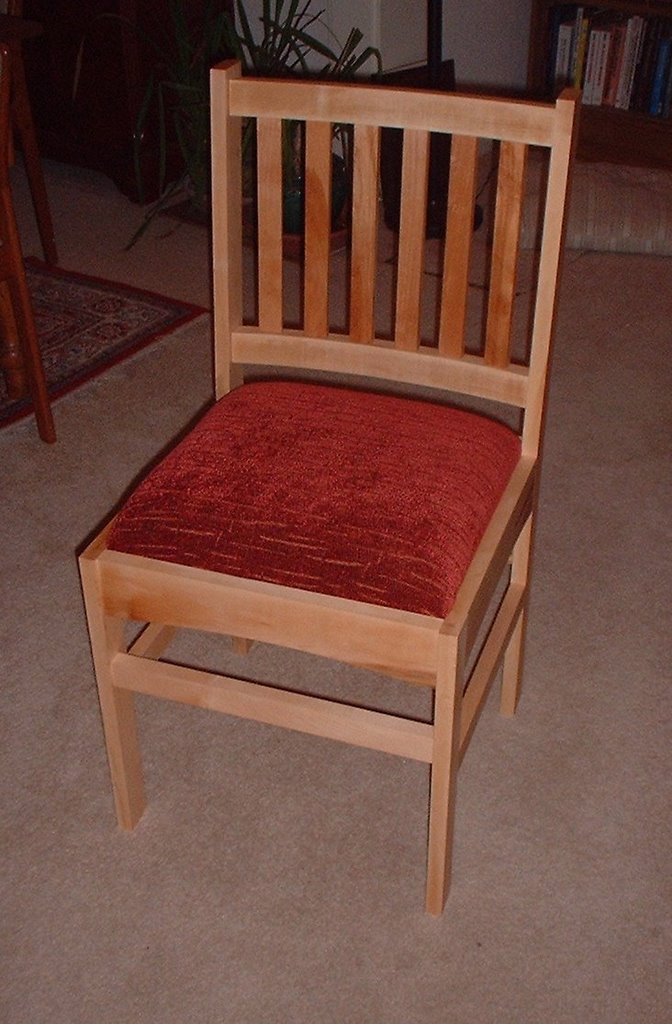
Wood: maple
Finish: Tried 'n True Danish Oil
Old tools used: Various planes, chisels, spokeshaves, etc.
Lessons learned: It might have helped to read up on chair design a bit, as I decided to change the rake angle of the back after I built the prototype.
Remarks: This is another project that will be the basis of a photo essay and eventually a class that I will teach at the local Woodcraft. As such, I have decided to give it its own page here. Photos will be added over time, as will other updated information.
Wood: birch, pine
Finish: Tung oil varnish top, black enamel paint base
Old tools used: Various planes, chisels, Japanese ryoba saw, etc.
This project has its own web page here.
Click here to go to the earlier furniture projects page.